Bitcoin Forum

Bitcoin => Hardware => Topic started by: dogie on April 27, 2014, 02:53:27 AM


Title: [Guide] Dogie's Comprehensive Technobit HEX8A1 Setup [HD]
Post by: dogie on April 27, 2014, 02:53:27 AM
Dogie's Miner Setup Guides:
   https://i.imgur.com/Yl3hE1L.png (http://goo.gl/ui9OUu) ASICMiner Blade (https://bitcointalk.org/index.php?topic=205369)
https://i.imgur.com/Yl3hE1L.png (http://goo.gl/PMNC5p) ASICMiner Cube (https://bitcointalk.org/index.php?topic=352658)
https://i.imgur.com/Yl3hE1L.png (http://goo.gl/D0bHu4) ASICMiner Tube (https://bitcointalk.org/index.php?topic=769570)
https://i.imgur.com/Yl3hE1L.png (http://goo.gl/zCmdYH) ASICMiner Prisma (https://bitcointalk.org/index.php?topic=876077)
https://i.imgur.com/Yl3hE1L.png (http://goo.gl/Bw9Ysy) Avalon Avalon2 (https://bitcointalk.org/index.php?topic=493358)
https://i.imgur.com/Yl3hE1L.png (http://goo.gl/hRfq8J) Avalon Avalon3 (https://bitcointalk.org/index.php?topic=751434)
https://i.imgur.com/Yl3hE1L.png (http://goo.gl/ncqplg) Avalon Avalon4 (https://bitcointalk.org/index.php?topic=922558)
https://i.imgur.com/Yl3hE1L.png (http://goo.gl/5Tkg3J) Avalon Avalon6 (https://bitcointalk.org/index.php?topic=1285350)
https://i.imgur.com/Yl3hE1L.png (http://goo.gl/qQvsSS) SpondooliesTech SP10 (https://bitcointalk.org/index.php?topic=525469)
https://i.imgur.com/Yl3hE1L.png (http://goo.gl/mOSLeL) SpondooliesTech SP20 (https://bitcointalk.org/index.php?topic=886633)
https://i.imgur.com/Yl3hE1L.png (http://goo.gl/1y5miM) SpondooliesTech SP30 (https://bitcointalk.org/index.php?topic=725760)
https://i.imgur.com/Yl3hE1L.png (http://goo.gl/jxHgLQ) SpondooliesTech SP35 (https://bitcointalk.org/index.php?topic=901600)
https://i.imgur.com/Yl3hE1L.png (http://goo.gl/zGBmmI) Technobit HEX16B (https://bitcointalk.org/index.php?topic=603930)
https://i.imgur.com/Yl3hE1L.png (http://goo.gl/F3m8Ty) Technobit HEX8A1 (https://bitcointalk.org/index.php?topic=586166)
https://i.imgur.com/Yl3hE1L.png (http://goo.gl/h9rwNd) Technobit HEX4M (https://bitcointalk.org/index.php?topic=768510)
https://i.imgur.com/Yl3hE1L.png (http://goo.gl/pm6ciH) Technobit 2HEX4M (https://bitcointalk.org/index.php?topic=834060)
https://i.imgur.com/Yl3hE1L.png (http://goo.gl/YMtOcS) KNCMiner Saturn/Jupiter (https://bitcointalk.org/index.php?topic=456033)
https://i.imgur.com/Yl3hE1L.png (http://goo.gl/QjlJR4) Bitmain AntMiner S1 (https://bitcointalk.org/index.php?topic=355387)
https://i.imgur.com/Yl3hE1L.png (http://goo.gl/VBsRGc) Bitmain AntMiner S2 (https://bitcointalk.org/index.php?topic=518205)
https://i.imgur.com/Yl3hE1L.png (http://goo.gl/hsHVOi) Bitmain AntMiner S3 (https://bitcointalk.org/index.php?topic=702653)
https://i.imgur.com/Yl3hE1L.png (http://goo.gl/I2Ba0w) Bitmain AntMiner S4 (https://bitcointalk.org/index.php?topic=813417)
https://i.imgur.com/Yl3hE1L.png (http://goo.gl/3ouBtY) Bitmain AntMiner S4+ (https://bitcointalk.org/index.php?topic=1035629)
https://i.imgur.com/Yl3hE1L.png (http://goo.gl/FsdByZ) Bitmain AntMiner S5 (https://bitcointalk.org/index.php?topic=910967)
https://i.imgur.com/Yl3hE1L.png (http://goo.gl/aDrsgI) Bitmain AntMiner S7 (https://bitcointalk.org/index.php?topic=1194785)
https://i.imgur.com/Yl3hE1L.png (http://goo.gl/PJSrb8) Bitmain AntMiner C1 (https://bitcointalk.org/index.php?topic=846095)
https://i.imgur.com/Yl3hE1L.png (http://goo.gl/acccjw) Bitmain AntMiner U3 (https://bitcointalk.org/index.php?topic=879732)
https://i.imgur.com/Yl3hE1L.png (http://goo.gl/qsORPl) RockMiner R-Box (https://bitcointalk.org/index.php?topic=639030)
https://i.imgur.com/Yl3hE1L.png (http://goo.gl/aYfCSh) RockMiner New R-Box (https://bitcointalk.org/index.php?topic=820214)
https://i.imgur.com/Yl3hE1L.png (http://goo.gl/4D4KmV) RockMiner R3-Box (https://bitcointalk.org/index.php?topic=684154)
https://i.imgur.com/Yl3hE1L.png (http://goo.gl/zX64nn) RockMiner T1 (https://bitcointalk.org/index.php?topic=758811)
https://i.imgur.com/Yl3hE1L.png (http://goo.gl/SnuQHC) HashCoins Apollo (https://bitcointalk.org/index.php?topic=881295)
https://i.imgur.com/Yl3hE1L.png (http://goo.gl/LxSJDs) HashCoins Ares (https://bitcointalk.org/index.php?topic=951075)
https://i.imgur.com/Yl3hE1L.png (http://goo.gl/96wvpD) NonceTech Sampo (https://bitcointalk.org/index.php?topic=570960)
https://i.imgur.com/Yl3hE1L.png (http://goo.gl/HcpCYW) Yiazo YBF (https://bitcointalk.org/index.php?topic=658682)
https://i.imgur.com/Yl3hE1L.png (http://goo.gl/IJuRk1) BTCGarden AMV1 (https://bitcointalk.org/index.php?topic=677707)
https://i.imgur.com/Yl3hE1L.png (http://goo.gl/QLMBt2) Bitmine Coincraft Desk V2 (https://bitcointalk.org/index.php?topic=721660)
https://i.imgur.com/Yl3hE1L.png (http://goo.gl/B3R65S) HashRatio Tsunami (https://bitcointalk.org/index.php?topic=723445)
https://i.imgur.com/Yl3hE1L.png (http://goo.gl/rxSVRm) XBTech Pacific 1250 (https://bitcointalk.org/index.php?topic=731436)
https://i.imgur.com/Yl3hE1L.png (http://goo.gl/DNu4m2) BitCrane T-110 (https://bitcointalk.org/index.php?topic=731655)
https://i.imgur.com/Yl3hE1L.png (http://goo.gl/70R7h3) Black Arrow Prospero X1 (https://bitcointalk.org/index.php?topic=807905)
https://i.imgur.com/Yl3hE1L.png (http://goo.gl/pSTUo6) AMT 1.25TH (https://bitcointalk.org/index.php?topic=809456)
https://i.imgur.com/Yl3hE1L.png (http://goo.gl/3GWDDv) C-Scape HexFury USB (https://bitcointalk.org/index.php?topic=555471)
https://i.imgur.com/Yl3hE1L.png (http://goo.gl/pOLHif) C-Scape BiFury USB (https://bitcointalk.org/index.php?topic=629658)
https://i.imgur.com/Yl3hE1L.png (http://goo.gl/mT2CUg) MoonlightMiner NanoFury II USB (https://bitcointalk.org/index.php?topic=560856)
    Gigampz PSU breakout board (https://bitcointalk.org/index.php?topic=652402)


    Guide meta thread (https://bitcointalk.org/index.php?topic=958599)
    DefaultTrust Visualisation (https://bitcointalk.org/index.php?topic=1062052)
    Power Supply analysis guide (https://bitcointalk.org/index.php?topic=486121)
    Manufacturer trustworthiness guide (https://bitcointalk.org/index.php?topic=456691)
___________________________________________________________________________________________________________________________


Nicely formatted version available at dogiecoin.com (http://goo.gl/F3m8Ty)!
https://i.imgur.com/ptViCVd.png (http://goo.gl/F3m8Ty)

https://i.imgur.com/AXm1t8k.png
Contents:
0a) What to Expect (#post_section0a)
0b) What You Need (#post_section0b)
1) Powering (#post_section1)
2) Cooling (#post_section2)
3) Case (#post_section3)
4a) Configuration (TL-MR3020) (#post_section4a)
4b) Configuration (Windows PC) (#post_section4b)
4c) Configuration (RaspberryPi) (#post_section4c)
5) Troubleshooting (#post_section5)
6) Where to buy (#post_section6)

https://i.imgur.com/AXm1t8k.png
0a) What to Expect (top) (#post_contents)
The Technobit HEX8A1 is a blade style ASIC mining board utilising 8 CoinCraft A1 chips. An external controller is required - this can be a TL-MR3020 router
with custom WRT firmware, a Raspberry Pi with Raspian or a windows based PC.

Per mining board:
Chips8x CoinCraft A1s
Hashrate~200GH stock, ~260GH OC'ed
Power.Consumption200W stock, 350W overclocked

 https://farm8.staticflickr.com/7271/14035538683_0e9b668e43_b.jpg (https://farm8.staticflickr.com/7271/14035538683_7409681855_o.jpg)

 https://farm3.staticflickr.com/2895/14027522795_c7bbba38c6.jpg (https://farm3.staticflickr.com/2895/14027522795_0fb9820077_o.jpg)     https://farm3.staticflickr.com/2930/14016068314_ceccc5ff32.jpg (https://farm3.staticflickr.com/2930/14016068314_726d98c71f_o.jpg)
 
 https://farm8.staticflickr.com/7135/14012432301_74675d81a3.jpg (https://farm8.staticflickr.com/7135/14012432301_f82726a1a0_o.jpg)     https://farm8.staticflickr.com/7335/13992477096_ac37b2da9a.jpg (https://farm8.staticflickr.com/7335/13992477096_162532032a_o.jpg)

https://i.imgur.com/AXm1t8k.png
0b) What You Need (top) (#post_contents)
You will need one of the following sets:

Using a TP-LINK as controller (recommended):
  • A TP-LINK TL-MR3020 router (http://goo.gl/k7RFz7).
  • A network cable (http://goo.gl/hCQilO).
  • A USB to mini USB cable (http://goo.gl/Znl3hJ).
  • Another USB to mini USB cable (http://goo.gl/Znl3hJ) or mains to mini USB cable (http://goo.gl/Rl7P3a).

OR using a PC as controller:
  • A USB to mini USB cable (http://goo.gl/Znl3hJ).

OR using a Raspberry Pi as controller:
  • A Raspberry Pi (http://goo.gl/g769Oy).
  • A Raspberry Pi case (http://goo.gl/GsP9rt).
  • A Raspberry Pi heatsink (http://goo.gl/snFblL).
  • An 8GB SDHC class 10 (http://goo.gl/p62UHO) card.
  • A powered USB hub (http://goo.gl/4IjhDU).
  • A micro USB power supply (http://goo.gl/fTkt8d).
  • A HDMI to DVI (http://goo.gl/gOm2Ay) / HDMI to HDMI cable (http://goo.gl/oG4G0z) (depending on your monitor).
  • An SD card reader (http://goo.gl/JAvXcZ) would be beneficial.
  • A network cable (http://goo.gl/hCQilO).
  • A USB to mini USB cable (http://goo.gl/Znl3hJ).

AND

  • A power supply (see next section)

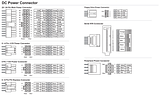
https://i.imgur.com/AXm1t8k.png
1) Powering (top) (#post_contents)
As with all blade style miners, the HEX8A1 does not come with a power supply. You will need a typical computer PSU with:

  • 2xPCI-E 6 pin power connectors per mining card
  • At least 28A on the/each 12V rail per mining card

Estimated power consumption per mining board is as follows:
  • ~200W (no overclock)
  • ~350W (overclock)

I would recommend the following PSUs:
For 1 miner:
(Click.your.flag)
https://i.imgur.com/J7bYdzf.gif (http://goo.gl/H1T86H)  https://i.imgur.com/KlUatat.png (http://goo.gl/xjh2Vp)  https://i.imgur.com/Ue7WjiA.gif (http://goo.gl/s5q1G7)  https://i.imgur.com/HdNENbbl.jpg (http://goo.gl/fyXpdq)  https://i.imgur.com/yTLejuRl.png (http://goo.gl/R1JtGo)  https://i.imgur.com/KR3I9ngl.jpg (http://goo.gl/ufUzsN)  https://i.imgur.com/iIbcCMMl.jpg (http://goo.gl/Nb40at)
For 2 miners*:
(Click.your.flag)
https://i.imgur.com/J7bYdzf.gif (http://goo.gl/ypPZ0v)  https://i.imgur.com/KlUatat.png (http://goo.gl/UdS2eA)  https://i.imgur.com/Ue7WjiA.gif (http://goo.gl/f8bsSv)  https://i.imgur.com/HdNENbbl.jpg (http://goo.gl/Vrbl9e)  https://i.imgur.com/yTLejuRl.png (http://goo.gl/G8OZXs)  https://i.imgur.com/KR3I9ngl.jpg (http://goo.gl/31JidP)  https://i.imgur.com/iIbcCMMl.jpg (http://goo.gl/OkAx7A)
*2 boards while overclocked or 3 at stock. Buy two PSUs for 4 boards (overclocked) - its the most price efficient solution.

We need to tell the PSU to always be on, as there isn't a motherboard to do this.

  • Cut a paper clip into a U and insert it into the green wire and to either black wire either side of the green wire. Tape it up for safety.
  • Plug 2x PCIE 6 pin into each blade. I would recommend running each PCI-E connector from a different cable rail when overclocking.
  • Plug the PSU into the mains.
  • The power supply will now be controlled by its switch on the rear socket.

 https://farm6.staticflickr.com/5540/14012412152_35161a54eb.jpg (https://farm6.staticflickr.com/5540/14012412152_cf4fedf343_o.jpg)     
 
 https://i.imgur.com/URnhwPH.jpg (https://i.imgur.com/URnhwPH.jpg)
 
https://i.imgur.com/AXm1t8k.png
2) Cooling (top) (#post_contents)
Mining boards come with two heatsinks each. The top uses a 2U aluminium heatsink over the chip area with a Sunon PMD1209PMB1-A (http://www.sunon.com/tw/products/pdf/DCFAN/PMD9238.pdf) 80mm fan. It is rated at
4900 RPM, 120CFM at a whopping 57 dbA. The bottom heatsink is a 1U full cover heatsink with a quieter Sunon ME92251VX 92mm fan (http://goo.gl/qvMWUL). Noise levels are very
high for a 250GH product, and potentially overcooled.
 
 https://farm8.staticflickr.com/7006/13992482616_c51ecff114.jpg (https://farm8.staticflickr.com/7006/13992482616_1361e0583e_o.jpg)     https://farm3.staticflickr.com/2901/14015593865_b841cd1b58.jpg (https://farm3.staticflickr.com/2901/14015593865_8cf450fc24_o.jpg)
 
 https://farm6.staticflickr.com/5092/13992517786_363ab79a9d.jpg (https://farm6.staticflickr.com/5092/13992517786_7bb89ee43f_o.jpg)     https://farm6.staticflickr.com/5100/14016088504_ba9916d0c2.jpg (https://farm6.staticflickr.com/5100/14016088504_28cfac1e60_o.jpg)
 
 https://farm6.staticflickr.com/5461/14035529703_7b72906c18.jpg (https://farm6.staticflickr.com/5461/14035529703_1293efd7ce_o.jpg)     https://farm8.staticflickr.com/7393/14015632755_b093fb3e3d.jpg (https://farm8.staticflickr.com/7393/14015632755_39db8ea3b7_o.jpg)
 
https://i.imgur.com/AXm1t8k.png

https://i.imgur.com/AXm1t8k.png
3) Case (top) (#post_contents)
Technobit HEX8A1s are not stackable top to bottom but can be side to side. 1TH could be arranged quite densely although would not be suitable to put in a
case due to the lack of directed airflow.

https://i.imgur.com/AXm1t8k.png
4a) Configuration (TL-MR3020) (top) (#post_contents)
An external controller is required which can be a TP-LINK TL-MR3020 (http://goo.gl/k7RFz7) router, a Raspberry Pi (http://goo.gl/g769Oy) with Raspian or a Windows based PC.

Using a modified TP Link MR3020
  • Power on as above.
  • Plug in a USB to mini USB cable (http://goo.gl/Znl3hJ) from the HEX8A1 to the TL-MR3020.
  • Plug in a network cable (http://goo.gl/hCQilO) from the TL-MR3020 to your router.
  • Plug in your TL-MR3020's power cable - this can either be a USB to mini USB (http://goo.gl/Znl3hJ) cable or mains to mini USB (http://goo.gl/Rl7P3a). ~0.3A @ 5V is required.
  • Flash Technobit's custom WRT firmware (http://goo.gl/1d0vxl) (or purchase their preflashed TL-MR3020 (http://goo.gl/WCRR1Q))
  • Change your router's subnet to 0, ie 192.168.0.x. This is just temporary. If this is not possible, see below indented steps.
    • Plug in a network cable (http://goo.gl/hCQilO) from the TL-MR3020 to your computer.
    • Navigate to Control Panel -> Network and Sharing Centre -> Change Adapter Settings
    • (If applicable) Right click on your wifi adapter -> Disable.
    • Right click on your ethernet adapter -> Properties
    • Click on "Internet Protocol Version 4" and click properties
    • Select "Use the following IP address" and enter the following:
    • IP Address: 192.168.0.1, Subnet Mask: 255.255.255.0, Default Gateway: 192.168.0.99
    • Resume normal steps.
  • Navigate to 192.168.0.99/ (http://192.168.0.99/) from a browser window.
  • Login with default username "root" and NO password.
  • Navigate to Network -> Interfaces and click edit.
  • Change protocol to DHCP client, click Save and Apply.
  • (If applicable)At this point you can plug the TL-MR3020 back into your router and reset your computer settings.
  • Navigate to your router and look up list of clients. Find the IP the TL-MR3020 has now been assigned and navigate to that with a browser window.
  • Login if prompted and navigate to Status -> Cgminer Configuration.
  • Enter pool information and miner details as in the format below.
  • Click save and apply, then navigate to Status -> Cgminer Status to check mining has started.

Antpool Register! (https://account.bitmain.com/sign_up)
Code:
Servers : stratum.antpool.com:3333
User    : username.worker or username_worker - auto creates workers!
Password: anypassword
BTCGuild Register! (https://www.btcguild.com/)
Code:
Servers : stratum.btcguild.com:3333
User    : username_worker
Password: anypassword
GHash IO Register! (https://cex.io/signup)
Code:
Servers : us1.ghash.io:3333
User    : username.worker  - auto creates workers!
Password: anypassword

https://i.imgur.com/AXm1t8k.png
4b) Configuration (Windows PC) (top) (#post_contents)
Using a Windows based PC
  • Plug in a USB to mini USB cable (http://goo.gl/Znl3hJ) from the HEX8A1 to your Windows based PC/laptop.
  • Windows will try and install its own drivers. Wait until it finishes.
  • Download the Zadig tool (http://ck.kolivas.org/apps/cgminer/zadig/) and run it.
  • Choose the HEX8A1 and "WinUSB". Click install driver.
  • Once installed, you may have to restart.
  • Download this specific version of cgminer (http://goo.gl/eSnDYV) and extract it.
  • Edit cgminer.conf using notepad, with your pool and miner information in it, an example as below.
  • Run cgminer.exe to start mining.

Code:
{
"pools" : [
{
"url" : "stratum.btcguild.com:3333",
"user" : "dogie_HEX8A1",
"pass" : "123"
},
{
"url" : "eu-stratum.btcguild.com:3333",
"user" : "dogie_HEX8A1",
"pass" : "123"
}
]
,
"expiry" : "120",
"hotplug" : "5",
"log" : "5",
"no-pool-disable" : true,
"queue" : "1",
"scan-time" : "60",
"set_default_to_c" : false,
"set_default_to_b" : false,
"set_default_to_8" : false,
"hexminera-voltage" : "1340",
"hexminera-options" : "16:450",
"hexminerb-voltage" : "900",
"hexminerb-options" : "16:540",
"hexminerc-voltage" : "1020",
"hexminerc-options" : "16:1300",
"hexminer8-set-diff-to-one" : "0",
"hexminer8-chip-mask" : "255",
"hexminer8-voltage" : "1000",
"hexminer8-options" : "8:260",
"kernel-path" : "/usr/local/bin"
}

Antpool Register! (https://account.bitmain.com/sign_up)
Code:
Servers : stratum.antpool.com:3333
User    : username.worker or username_worker - auto creates workers!
Password: anypassword
BTCGuild Register! (https://www.btcguild.com/)
Code:
Servers : stratum.btcguild.com:3333
User    : username_worker
Password: anypassword
GHash IO Register! (https://cex.io/signup)
Code:
Servers : us1.ghash.io:3333
User    : username.worker  - auto creates workers!
Password: anypassword

https://i.imgur.com/AXm1t8k.png
4c) Configuration (Raspberry Pi) (top) (#post_contents)
Using a Raspberry Pi
You will need the following:
  • A Raspberry Pi (http://goo.gl/g769Oy).
  • A Raspberry Pi case (http://goo.gl/GsP9rt).
  • A Raspberry Pi heatsink (http://goo.gl/snFblL).
  • A 8GB SDHC class 10 card (http://goo.gl/p62UHO).
  • A powered USB hub (http://goo.gl/4IjhDU).
  • A micro USB power supply (http://goo.gl/fTkt8d).
  • A HDMI to DVI (http://goo.gl/gOm2Ay) / HDMI to HDMI cable (http://goo.gl/oG4G0z) (depending on your monitor).
  • An SD card reader (http://goo.gl/JAvXcZ) would be beneficial.
  • A network cable (http://goo.gl/hCQilO).

  • Power on as above.
  • Put SD card into another computer.
  • Download (http://goo.gl/LI8IBN) Raspbian OS
  • Download (http://goo.gl/A22fj5) Win32 Disk Imager and use it to flash SD card with Raspbian.
  • Put the SD card into the Raspbery Pi.
  • Plug in the following:
  • An ethernet cable from the Raspberry Pi to your router.
  • A HDMI to DVI / HDMI to HDMI cable from the Raspberry Pi to your monitor.
    • An external USB hub to Raspberry Pi.
    • A USB mouse and keyboard into the USB hub.
    • A micro USB power adapter into Raspberry Pi - this will boot it up.

  • Once booted, a first time config will pop up
  • Run expand_rootfs
    • Run configure_keyboard to put your local layout on (it defaults to UK).
    • Run update to get the latest files.
    • Boot to desktop.
  • Open "LX Terminal". Type the following commands, one line at a time. Press enter after each one.

Code:
sudo apt-get update
sudo apt-get install libusb-1.0-0-dev libusb-1.0-0 libcurl4-openssl-dev libncurses5-dev libudev-dev
wget http://ck.kolivas.org/apps/cgminer/4.2/cgminer-4.2.2.tar.bz2
tar xvf cgminer-4.2.2.tar.bz2
mv /home/pi/cgminer-4.2.2/ /home/pi/cgminer/
cd cgminer
wget https://www.dropbox.com/s/1kspms3gw0336du/5ed45a0d7a3bd71ed1b8726e5f1cdac55bf68196.patch
patch -p1 < 5ed45a0d7a3bd71ed1b8726e5f1cdac55bf68196.patch
./configure --enable-hexminera --enable-hexminerb --enable-hexminerc --enable-hexminer8 --hexminer8-set-diff-to-one 0 --hexminer8-chip-mask 255 --hexminer8-voltage 1000 --hexminer8-options 8:260 --hexminera-voltage 1340 --hexminera-options 16:450 --hexminerb-voltage 900 --hexminerb-options 16:1300 hexminerc-voltage 1020 --hexminerc-options 16:1300
sudo make

  • Now enter 'sudo shutdown now' to turn the Pi off.
  • Plug in a USB to mini USB cable (http://goo.gl/Znl3hJ) from the HEX8A1 to an externally powered USB hub.
  • Plug in the USB hub to the Pi and plug in its power supply.
  • Turn on your power supply with its rear switch. Your power supply's fan should turn on gently.
  • Turn the Pi back on (unplug and plug in its power cable).
  • When back on desktop, reopen "LX Terminal".
  • Enter the following code and click enter to start mining.

Code:
sudo nohup /home/pi/cgminer/cgminer -c /home/pi/cgminer/cgminer.conf

  • If cgminer comes up and works fine, let it run for 5 minutes and check your hardware.
  • Then reboot again with "sudo restart".
  • Once booted up, enter the following command into "LX Terminal".

Code:
sudo nano /etc/xdg/lxsession/LXDE/autostart

  • This line will open up a file editor. Enter the line below to the end of the code in the file.
  • Once finished, press Ctrl + x to exit, Y to confirm and enter to save.

Code:
@/usr/bin/lxterminal --geometry=90x35 -e sudo ./cgminer/cgminer -c /home/pi/cgminer/cgminer.conf

  • cgminer will now auto start when the Pi turns on, hurrah!
  • Now run the following commands one by one to install the equivalent of Teamviewer.

Code:
sudo apt-get install x11vnc
x11vnc -storepasswd
****enter a password****
cd .config
mkdir autostart
cd autostart
nano x11vnc.desktop

  • Same as last time, enter the below text at the end, then click Ctrl + X, Y and enter.

Code:
[Desktop Entry]
Encoding=UTF-8
Type=Application
Name=X11VNC
Comment=
Exec=x11vnc -forever -usepw -display :0 -ultrafilexfer
StartupNotify=false
Terminal=false
Hidden=false

  • Now enter "nano /boot/config.txt"
  • Scroll down until you find the line "#hdmi_force_hotplug=1" and delete the "#".
  • Ctrl + X, Y and enter to save.
  • You can now connect to your Pi externally by downloading (http://www.tightvnc.com/download.php) TightVNC on your Windows PC and installing. You only need the viewer.
  • Open it and enter the IP of your Pi, followed by two colons and then port 5900, ie "192.168.1.85::5900"
  • This will auto start whenever the Pi is on.
  • Turn off Pi with 'sudo shutdown now'. Unplug monitor, keyboard and mouse and put the Pi along with your miner where you want it to live long term.
    The Pi only requires wired internet and micro usb power. You can connect remotely from now on and don't need a monitor etc.

https://i.imgur.com/AXm1t8k.png

https://i.imgur.com/AXm1t8k.png
5) Troubleshooting (top) (#post_contents)

ProblemSolution
My.power.supply's.cables.are.braided.or.aren't.color.coded- See below diagram for pin-outs.
http://i1279.photobucket.com/albums/y530/dogiee/th_5_zps00eb3a34.png (https://i.imgur.com/fgkLFUA.png)

 https://farm3.staticflickr.com/2930/14012349062_51d8262a05.jpg (https://farm3.staticflickr.com/2930/14012349062_8d2820bb8b_o.jpg)     https://farm8.staticflickr.com/7309/13992465596_5e3f364104.jpg (https://farm8.staticflickr.com/7309/13992465596_aaee404192_o.jpg)

 https://farm6.staticflickr.com/5300/14012380112_69dd626fd3.jpg (https://farm6.staticflickr.com/5300/14012380112_8ba654d226_o.jpg)     https://farm6.staticflickr.com/5018/14012361502_8bf58cfc15.jpg (https://farm6.staticflickr.com/5018/14012361502_2cc10948d9_o.jpg)

Legal disclaimer: This information is for general guidance and does not constitute expert advice. We are not responsible if you, your property or a third
party is injured or damaged as a result of any interaction with this information, and no warranty is provided. All text and images are covered by copyright.
https://i.imgur.com/AXm1t8k.png
6) Where to buy (top) (#post_contents)

             https://i.imgur.com/nbE2zmI.jpg (http://goo.gl/NLiqVB)    https://i.imgur.com/VrKwdav.jpg (http://goo.gl/NLiqVB)    https://i.imgur.com/DKBxvTA.jpg (http://goo.gl/NLiqVB)
            
https://i.imgur.com/AXm1t8k.png


Title: Re: [Guide] Dogie's Comprehensive Technobit HEX8A1 Setup [HD]
Post by: Zich on April 27, 2014, 03:25:48 AM
Nice review,  disassembly part is my favorite  ;D


Title: Re: [Guide] Dogie's Comprehensive Technobit HEX8A1 Setup [HD]
Post by: QuiveringGibbage on April 27, 2014, 09:21:20 AM
hey dogie, nice work but few typos i think in the rpi instructions. I followed it and still can't get cgminer to start. see bottom of this post for my issue.

  • Power on as above.
  • Download (http://goo.gl/QybxqO) Raspbian OS
You are grabbing image from Canaan-creative.com. That's Avalon.

Code:
wget http://ck.kolivas.org/apps/cgminer/4.2/cgminer-4.2.2.tar.bz2
tar xvf cgminer-4.2.2.bz2
tar xvf cgminer-4.2.2.tar.bz2
can we use cgminer-4.3.0?

Code:
./autogen.sh
./configuration --enable-hexminera --enable-hexminerc
sudo make
sudo make install
sudo ./cgminer
    ./autogen.sh not required
    ./configure --enable-hexminer8  <-- right? this is a guide for HEX8A1...
    sudo make install not required
    sudo ./cgminer not required

    • When back on desktop, reopen "LX Terminal".
    • Enter the following code and click enter to start mining.
    Code:
    sudo nohup /home/pi/cgminer/cgminer --hexminerc-voltage 1080 --hexminerc-options 16:1400 -c /home/pi/cgminer/cgminer.conf
    that ain't HEX8A1 commands... should be this right?:
    sudo nohup /home/pi/cgminer/cgminer --hexminer8-set-diff-to-one 0 --hexminer8-chip-mask 255 --hexminer8-voltage 1000 --hexminer8-options 8:260 -c /home/pi/cgminer/cgminer.conf

    but i get this:
    Code:
    pi@raspberrypi ~ $ sudo nohup /home/pi/cgminer/cgminer --hexminer8-set-diff-to-one 0 --hexminer8-chip-mask 255 --hexminer8-voltage 1000 --hexminer8-options 8:260 -c /home/pi/cgminer/cgminer.conf
    nohup: ignoring input and appending output to `nohup.out'
    pi@raspberrypi ~ $
    and nothing happens, cgminer not running.

    Cheers,
    QG


    Title: Re: [Guide] Dogie's Comprehensive Technobit HEX8A1 Setup [HD]
    Post by: dogie on April 27, 2014, 01:51:47 PM

    • When back on desktop, reopen "LX Terminal".
    • Enter the following code and click enter to start mining.
    Code:
    sudo nohup /home/pi/cgminer/cgminer --hexminerc-voltage 1080 --hexminerc-options 16:1400 -c /home/pi/cgminer/cgminer.conf
    that ain't HEX8A1 commands... should be this right?:
    sudo nohup /home/pi/cgminer/cgminer --hexminer8-set-diff-to-one 0 --hexminer8-chip-mask 255 --hexminer8-voltage 1000 --hexminer8-options 8:260 -c /home/pi/cgminer/cgminer.conf

    but i get this:
    Code:
    pi@raspberrypi ~ $ sudo nohup /home/pi/cgminer/cgminer --hexminer8-set-diff-to-one 0 --hexminer8-chip-mask 255 --hexminer8-voltage 1000 --hexminer8-options 8:260 -c /home/pi/cgminer/cgminer.conf
    nohup: ignoring input and appending output to `nohup.out'
    pi@raspberrypi ~ $
    and nothing happens, cgminer not running.

    Cheers,
    QG

    First link fixed.
    You can use any cgminer version after 4.2.2 - as long as a Technobit patch is ready.
    I think its ./configure, not got a linux interface nearby to check. Should also be
    Code:
    ./configure --enable-hexminera --enable-hexminerb --enable-hexminerc --enable-hexminer8 --hexminer8-set-diff-to-one 0 --hexminer8-chip-mask 255 --hexminer8-voltage 1000 --hexminer8-options 8:260 --hexminera-voltage 1340 --hexminera-options 16:450 --hexminerb-voltage 900 --hexminerb-options 16:1300 hexminerc-voltage 1020 --hexminerc-options 16:1300
    and
    Code:
    sudo nohup /home/pi/cgminer/cgminer -c /home/pi/cgminer/cgminer.conf

    Ignoring input means one of the -- options was wrong.


    Title: Re: [Guide] Dogie's Comprehensive Technobit HEX8A1 Setup [HD]
    Post by: Zich on April 28, 2014, 01:28:27 AM

    can we use cgminer-4.3.0?


    Cheers,
    QG

    Patch for cgminer-4.3.0 not available yet.
    Latest patch is for cgmner-4.2.3.


    Title: Re: [Guide] Dogie's Comprehensive Technobit HEX8A1 Setup [HD]
    Post by: cannachris on May 02, 2014, 01:06:28 AM
    Could  one of you kind ladies and gentlemen point me to a quieter fan that I could replace the top fan with?

    Thank you!


    Title: Re: [Guide] Dogie's Comprehensive Technobit HEX8A1 Setup [HD]
    Post by: Zich on May 02, 2014, 01:33:08 AM
    Could  one of you kind ladies and gentlemen point me to a quieter fan that I could replace the top fan with?

    Thank you!

    If you want to replace with quiet fan, then you need to underclock the setting to about 220 GH/s.


    Title: Re: [Guide] Dogie's Comprehensive Technobit HEX8A1 Setup [HD]
    Post by: dogie on May 02, 2014, 08:57:57 AM
    Could  one of you kind ladies and gentlemen point me to a quieter fan that I could replace the top fan with?

    Thank you!

    If you want to replace with quiet fan, then you need to underclock the setting to about 220 GH/s.
    And you'll need about 70-80CFM. Or you could use two ~50s side by side but would need another way to mount them and the other fan.


    Title: Re: [Guide] Dogie's Comprehensive Technobit HEX8A1 Setup [HD]
    Post by: cannachris on May 02, 2014, 02:11:29 PM
    Could  one of you kind ladies and gentlemen point me to a quieter fan that I could replace the top fan with?

    Thank you!

    If you want to replace with quiet fan, then you need to underclock the setting to about 220 GH/s.

    No queiter fans exist that  can provide similar airflow? I find that hard to beleive (no offense)

    Maybe I should build a box for it the  noise is surpassing my 4 antminers stacked next to it.


    Title: Re: [Guide] Dogie's Comprehensive Technobit HEX8A1 Setup [HD]
    Post by: dogie on May 02, 2014, 07:00:30 PM
    No queiter fans exist that  can provide similar airflow? I find that hard to beleive (no offense)

    Maybe I should build a box for it the  noise is surpassing my 4 antminers stacked next to it.

    Short answer, no. There's just basic laws of physics/engineering that mean when you move air so fast past air which isn't moving at all you get turbulence which generates x amount of noise.


    Title: Re: [Guide] Dogie's Comprehensive Technobit HEX8A1 Setup [HD]
    Post by: jimmothy on May 02, 2014, 07:13:43 PM
    Have you tried underclocking? Bitfury claims their chips can go as low as 0.38w/gh at lowest voltage.


    Title: Re: [Guide] Dogie's Comprehensive Technobit HEX8A1 Setup [HD]
    Post by: dogie on May 02, 2014, 07:54:29 PM
    Have you tried underclocking? Bitfury claims their chips can go as low as 0.38w/gh at lowest voltage.


    These are A1s?


    Title: Re: [Guide] Dogie's Comprehensive Technobit HEX8A1 Setup [HD]
    Post by: jimmothy on May 02, 2014, 07:56:30 PM
    Have you tried underclocking? Bitfury claims their chips can go as low as 0.38w/gh at lowest voltage.


    These are A1s?

    My bad. Same question though.


    Title: Re: [Guide] Dogie's Comprehensive Technobit HEX8A1 Setup [HD]
    Post by: dogie on May 03, 2014, 08:22:22 AM
    Have you tried underclocking? Bitfury claims their chips can go as low as 0.38w/gh at lowest voltage.


    These are A1s?

    My bad. Same question though.
    A1s were meant to have a low power mode but it caused problems and isn't operational, so there's no real power savings to speak of.


    Title: Re: [Guide] Dogie's Comprehensive Technobit HEX8A1 Setup [HD]
    Post by: dogie on May 11, 2014, 12:19:12 AM
    Updated OP with some additional info.


    Title: Re: [Guide] Dogie's Comprehensive Technobit HEX8A1 Setup [HD]
    Post by: ISAWHIM on May 11, 2014, 09:31:27 PM
    Interesting


    Title: Re: [Guide] Dogie's Comprehensive Technobit HEX8A1 Setup [HD]
    Post by: dogie on May 19, 2014, 01:20:04 PM
    Nicely formatted version available at www.dogiecoin.com (http://www.dogiecoin.com/technobit-hex8a1.html)!
    http://i1279.photobucket.com/albums/y530/dogiee/dogiecoin/dogiecoinforforum_zpsb0fbe7f9.png (http://www.dogiecoin.com/technobit-hex8a1.html)


    Title: Re: [Guide] Dogie's Comprehensive Technobit HEX8A1 Setup [HD]
    Post by: ZBC3 on June 17, 2014, 05:46:18 PM
    Would the corsair 750 cxm work for 2 of 260 GH/s miners?

    Would you use the dual PCIe cable for one miner, or would you use both cords for one miner? What about utilizing dual Sata to PCIe with 18g wire for one of the PCIe slots?

    I see you recommend the the cx series and wanted to ask before blowing another PSU.


    Title: Re: [Guide] Dogie's Comprehensive Technobit HEX8A1 Setup [HD]
    Post by: dogie on June 17, 2014, 08:13:12 PM
    Would the corsair 750 cxm work for 2 of 260 GH/s miners?

    Would you use the dual PCIe cable for one miner, or would you use both cords for one miner? What about utilizing dual Sata to PCIe with 18g wire for one of the PCIe slots?

    I see you recommend the the cx series and wanted to ask before blowing another PSU.


    You should be fine running off the same cable rails so a 750cxm is fine.


    Title: Re: [Guide] Dogie's Comprehensive Technobit HEX8A1 Setup [HD]
    Post by: meetniq on September 03, 2014, 04:00:20 PM
    Hi doggie,

    im strugglin with r-pi guide,

    first
    Code:
    tar xvf cgminer-4.2.2.tar.bz2

    doesnt work, we have to use bunzip2 first.

    Then
    Code:
    ./configure --enable-hexminera --enable-hexminerb --enable-hexminerc --enable-hexminer8 --hexminer8-set-diff-to-one 0 --hexminer8-chip-mask 255 --hexminer8-voltage 1000 --hexminer8-options 8:260 --hexminera-voltage 1340 --hexminera-options 16:450 --hexminerb-voltage 900 --hexminerb-options 16:1300 hexminerc-voltage 1020 --hexminerc-options 16:1300

    guives follow error:

    configure: error: unrecognized option: `--hexminer8-set-diff-to-one'
    Try `./configure --help' for more information

    any sugestion?

    edit:
    after deletin that option i get the same error in all options "unrecognized option"


    does anyone have an already compiled version?


    Title: Re: [Guide] Dogie's Comprehensive Technobit HEX8A1 Setup [HD]
    Post by: dogie on September 03, 2014, 05:27:03 PM
    Hi doggie,

    im strugglin with r-pi guide,

    first
    Code:
    tar xvf cgminer-4.2.2.tar.bz2

    doesnt work, we have to use bunzip2 first.

    Then
    Code:
    ./configure --enable-hexminera --enable-hexminerb --enable-hexminerc --enable-hexminer8 --hexminer8-set-diff-to-one 0 --hexminer8-chip-mask 255 --hexminer8-voltage 1000 --hexminer8-options 8:260 --hexminera-voltage 1340 --hexminera-options 16:450 --hexminerb-voltage 900 --hexminerb-options 16:1300 hexminerc-voltage 1020 --hexminerc-options 16:1300

    guives follow error:

    configure: error: unrecognized option: `--hexminer8-set-diff-to-one'
    Try `./configure --help' for more information

    any sugestion?

    edit:
    after deletin that option i get the same error in all options "unrecognized option"


    does anyone have an already compiled version?

    Both of those are correct because they've been used before, you sure you downloaded the right cgminer? Also just get yourself a TP-Link, PIs are generally unsupported for Technobit moving forwards.


    Title: Re: [Guide] Dogie's Comprehensive Technobit HEX8A1 Setup [HD]
    Post by: cannachris on October 04, 2014, 01:30:59 PM
    Hey my technobit router doesn't seem to really connect poolside since upgrade to 0.4.0. I did enable udev and cgminer and it gets a correct  ip  address but  no  hashing  poolside...


    Title: Re: [Guide] Dogie's Comprehensive Technobit HEX8A1 Setup [HD]
    Post by: loshia on October 04, 2014, 05:50:59 PM
    Hey my technobit router doesn't seem to really connect poolside since upgrade to 0.4.0. I did enable udev and cgminer and it gets a correct  ip  address but  no  hashing  poolside...
    Dude execute /usr/bin/fix_rc and make 100% sure there are no blanks left in cgminer web tabs
    Do screen -r and you will see what is left blank


    Title: Re: [Guide] Dogie's Comprehensive Technobit HEX8A1 Setup [HD]
    Post by: technobitVesi on October 04, 2014, 06:21:00 PM
    Hey my technobit router doesn't seem to really connect poolside since upgrade to 0.4.0. I did enable udev and cgminer and it gets a correct  ip  address but  no  hashing  poolside...
    HI,
    It is written in the changelog:
    Please do the folowing:
    1. Log in to the TP-link SSH
    2. type fix_rc
    The unit will reboot.
    3. Press enter a few times until it says network conection terminated, then right click -> restart sesion -> log in-> screen -r

    Everything should be OK now

    Regards: Vesi