Dong yuan launching Ebit E9+ mining machine water cooling kit, Effective noise reduction and cooling, stability hashrate.
Last week, Dong yuan water cooling kit who aim at Ebit E9+ mining machine developed successfully, through some friends trying, and the effect is ideal, reduce the mining machine noise and temperature effectively, hashrate also becomes relatively stable.
Not only the effect is remarkable, but also the price of water cooling kit is reasonable, and the cost performance is very good.
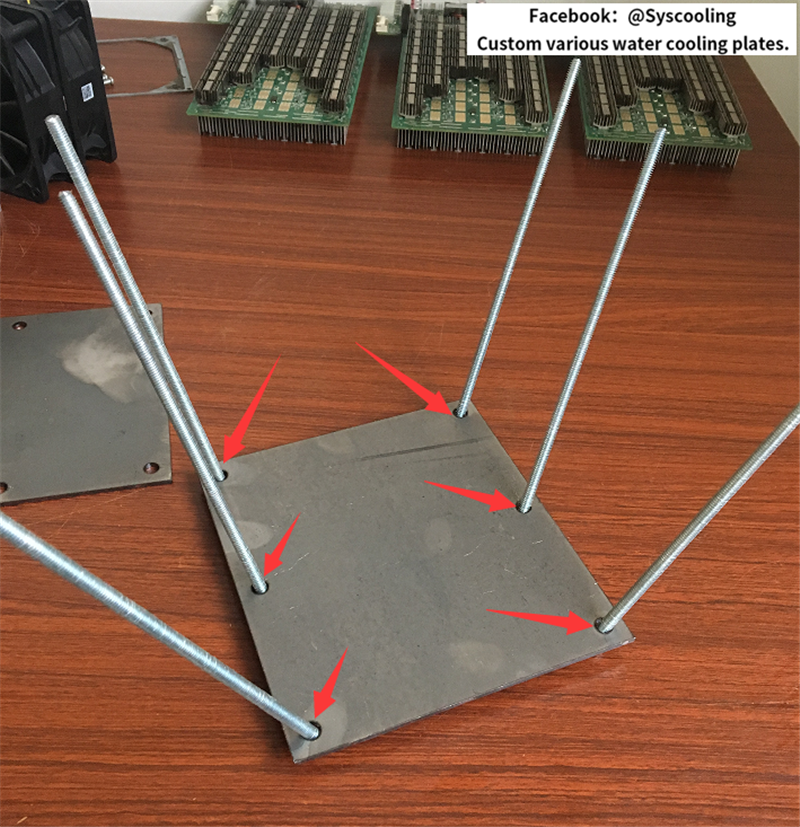
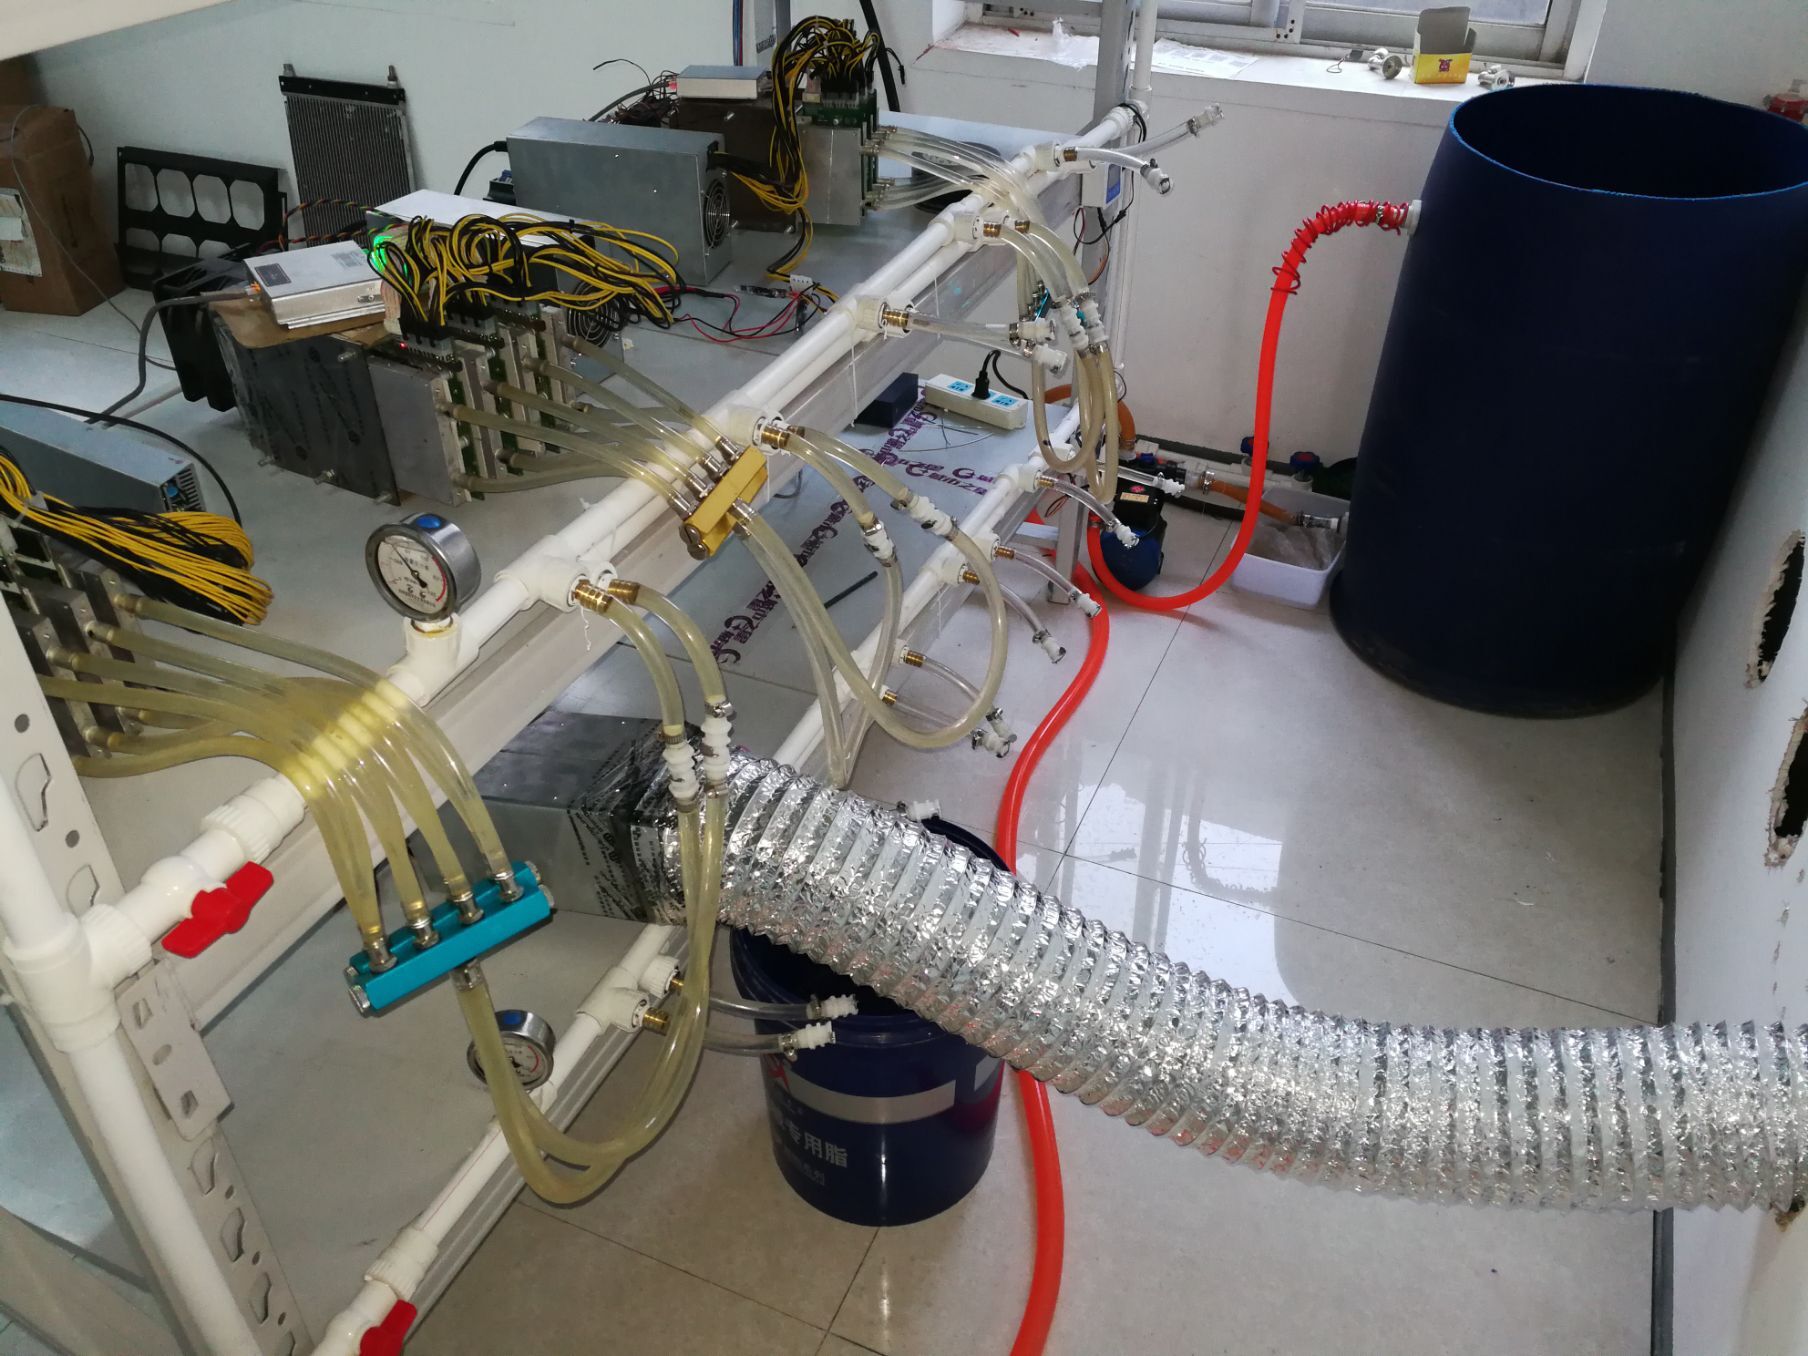
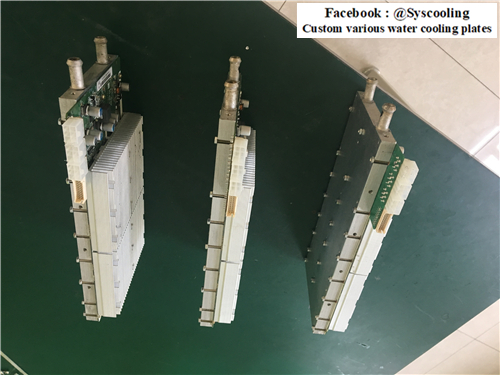
https://s2.postimg.org/5r0ijpoll/image.jpgThe details of the kit:
1. E9 water cooling kit
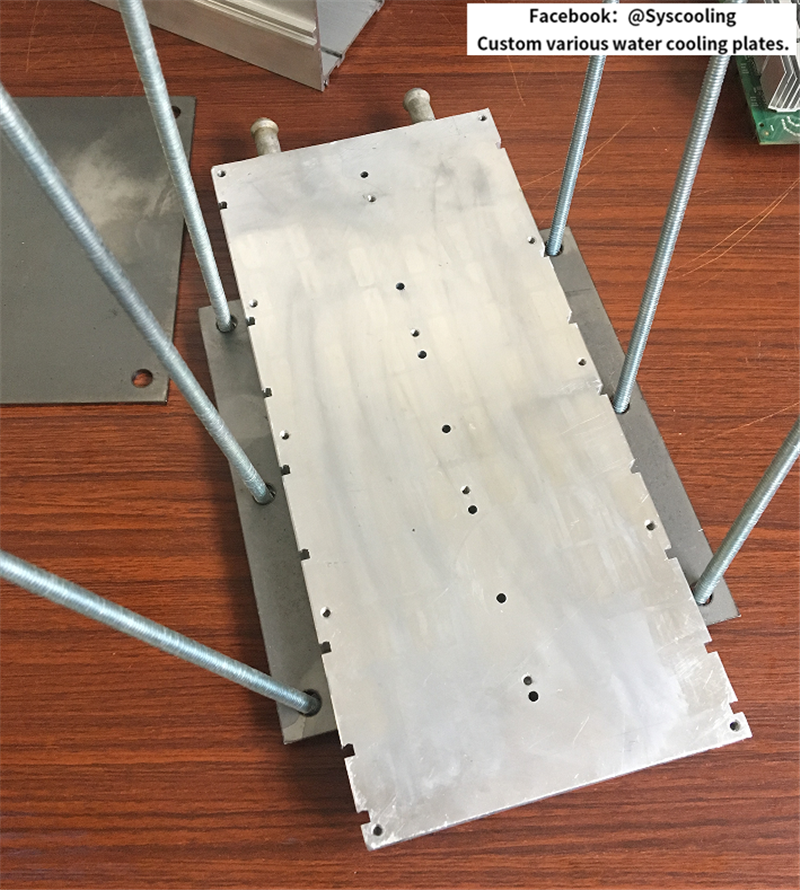
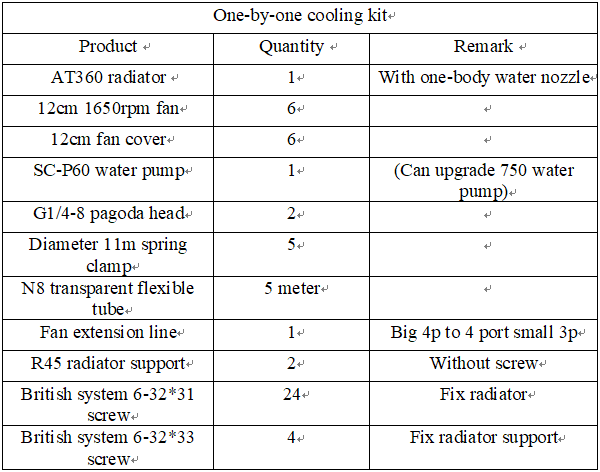
https://s1.ax1x.com/2017/12/06/o4MM4.png2.One-by-one cooling kit
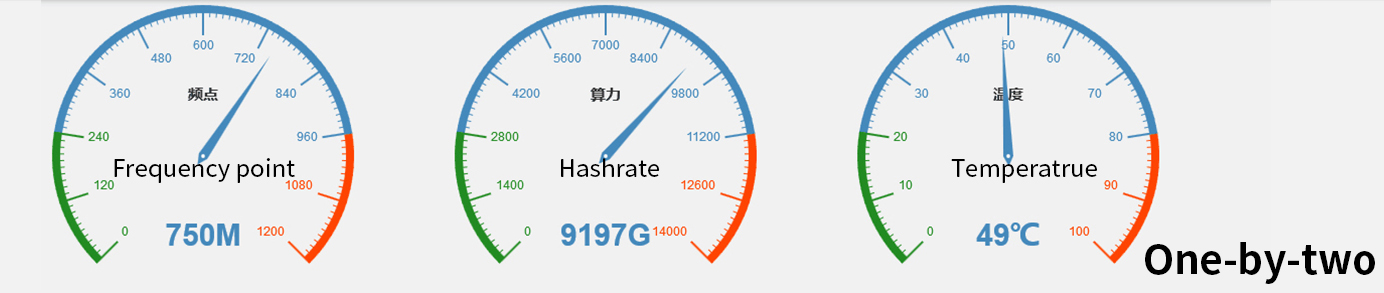
https://s1.ax1x.com/2017/12/06/o4QsJ.png3.One-by-two cooling kit
https://s1.ax1x.com/2017/12/06/o4uzF.pngTips:
>>E9 water cooling kit only include water cooling plate and necessary accessories for heat absorbing, the customers who are longing the free water resource can purchase E9 water cooling kit separately, other customers need match one-by-one or one-by-two cooling kit to make up the complete water cooling system.
>>One-by-two cooling kit mean that every set of cooling kit can support two sets of E9 water cooling kits.
>>Modification has risk, please purchase this kit after ensuring your DIY ability.
>>Once the product is sold, if appear the quality problem, we willprovide free warranty service, not support return.
>>Purchasing represent that you understand and willing to take risk in the process of modification.
Test results of hashrate and temperature after friend's Installation:
https://s1.ax1x.com/2017/12/06/ohk4K.jpghttps://s1.ax1x.com/2017/12/06/ohZge.jpgThe detailed installed process:
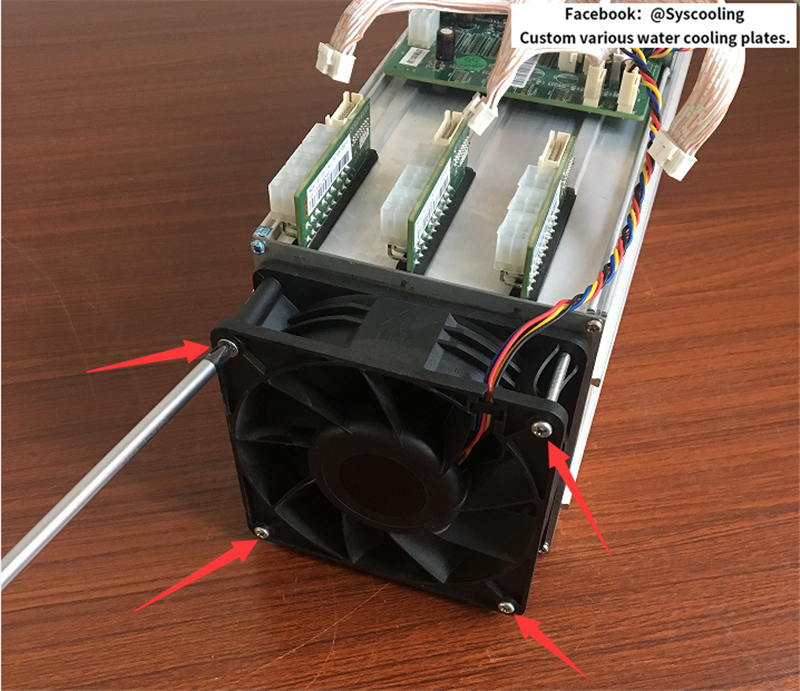
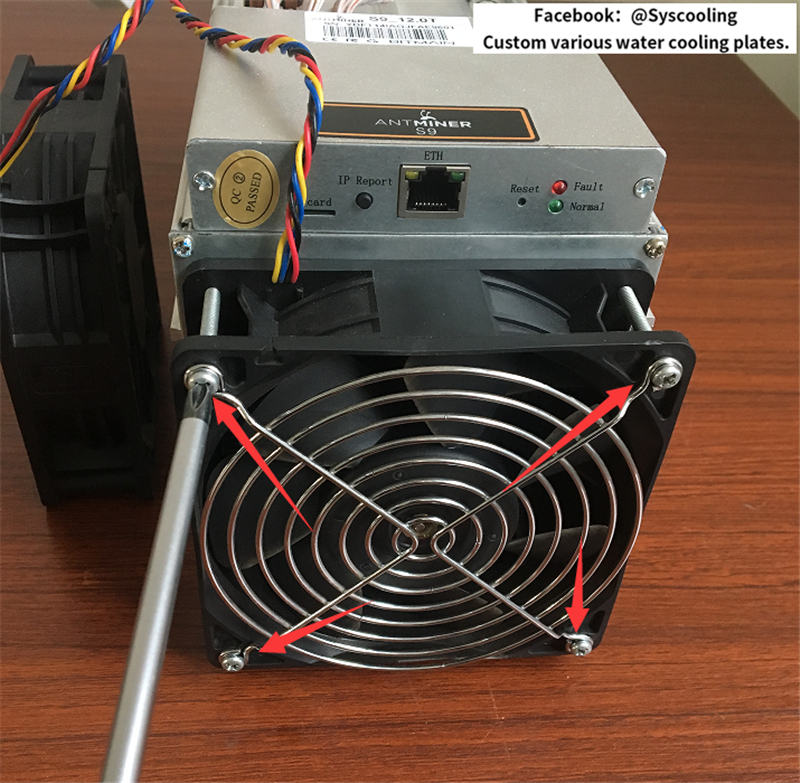
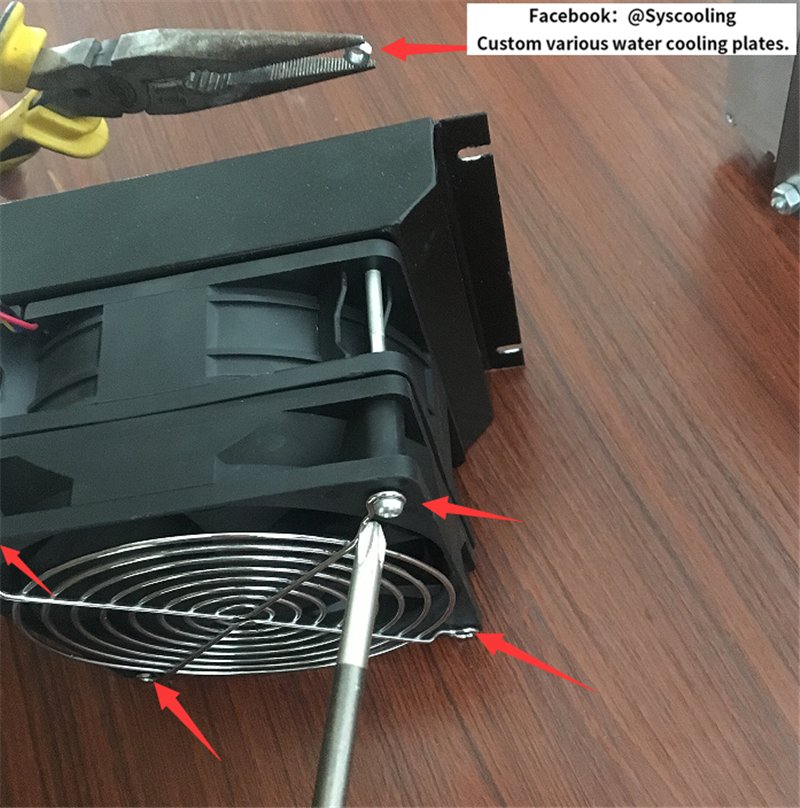
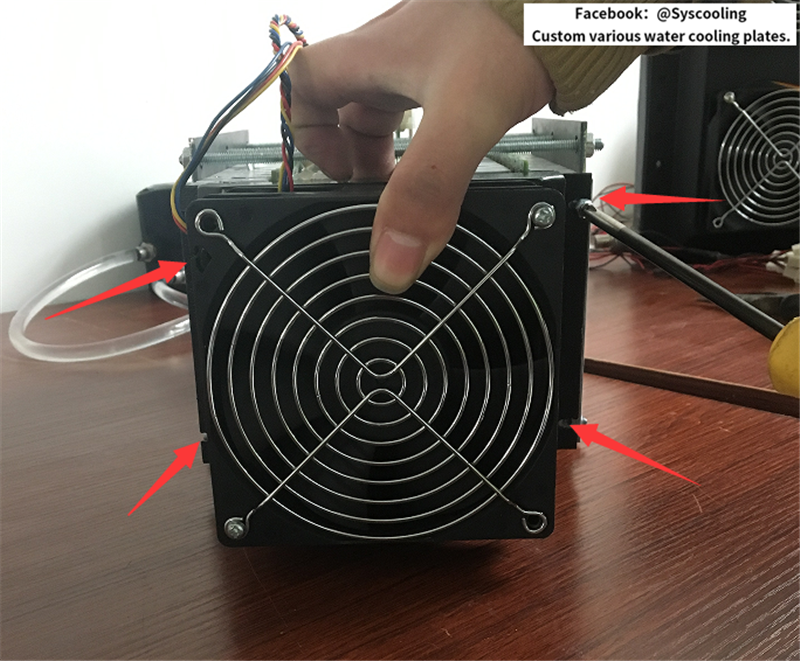
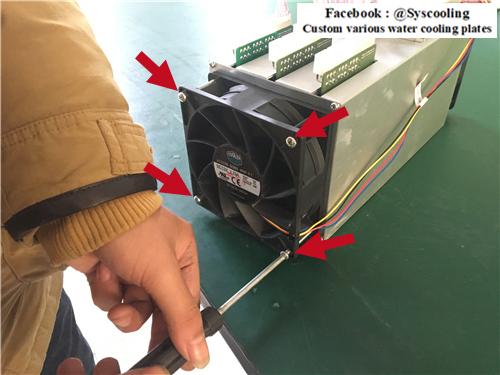
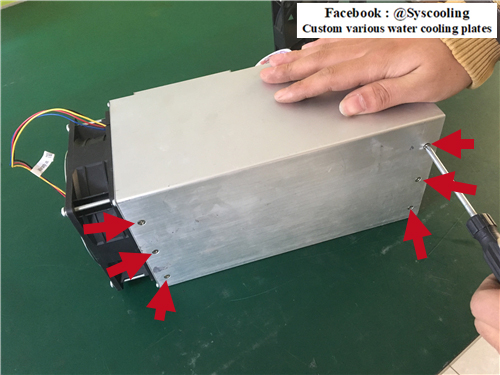
(1)screw off 4 screws which is on the fan
https://s1.ax1x.com/2017/12/06/ohE9O.jpg(2)screw off 4 screws which is on the fan support
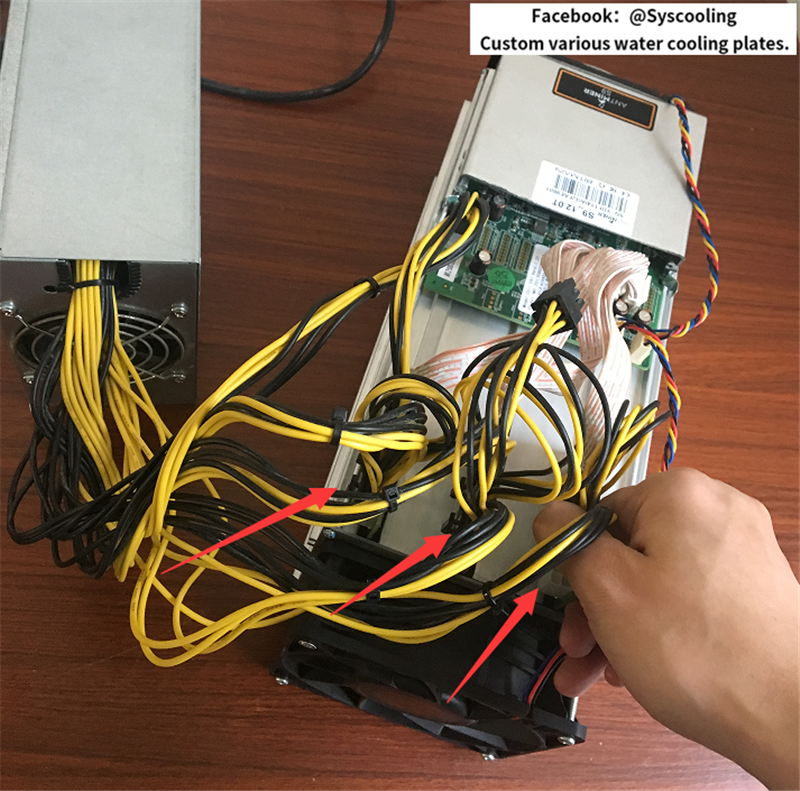
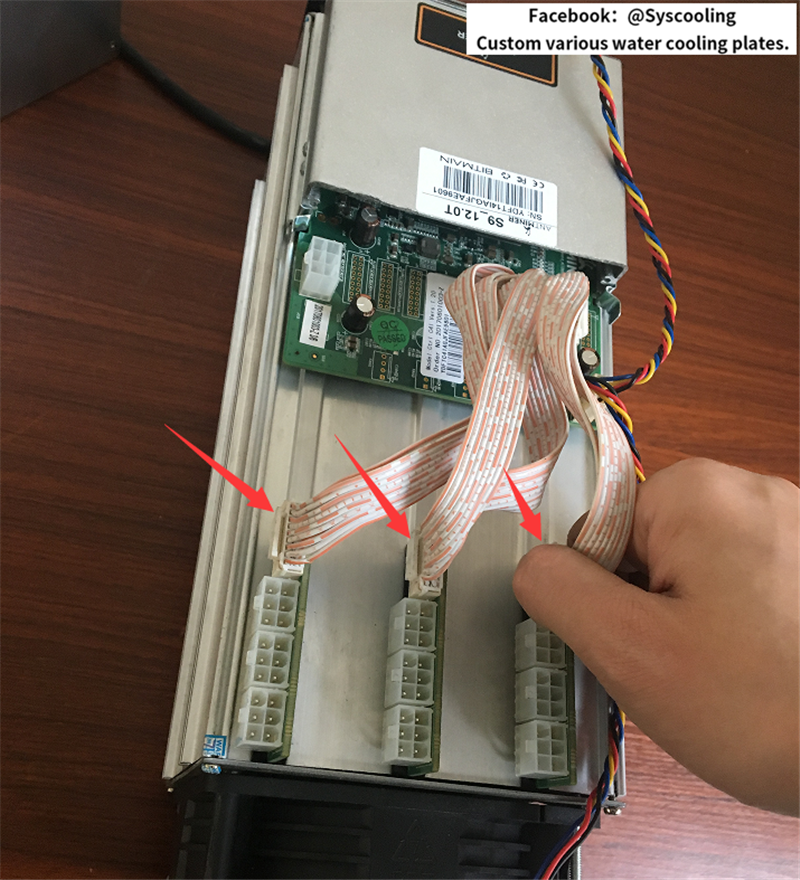
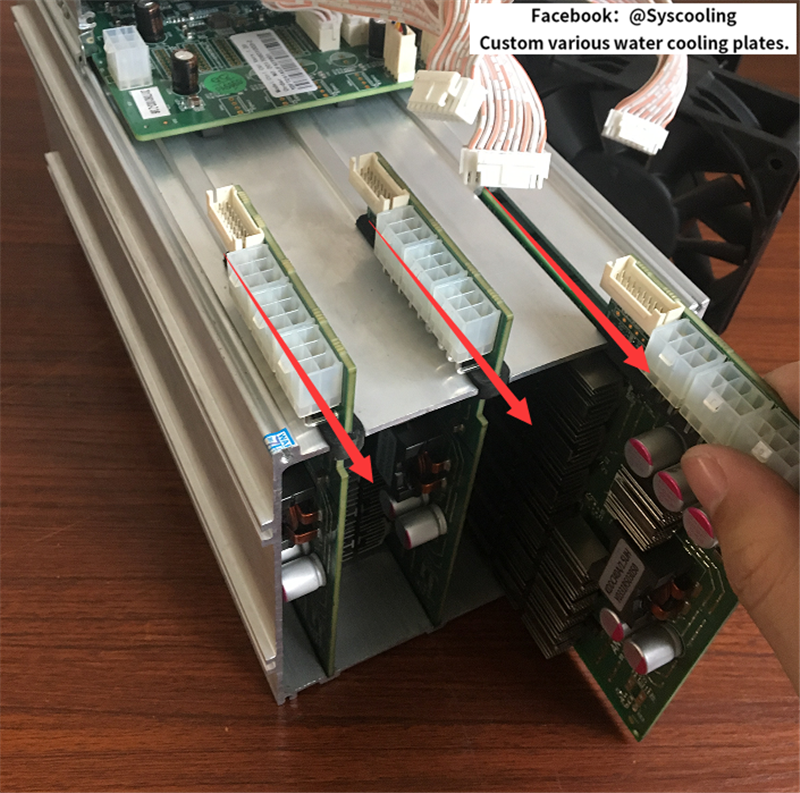
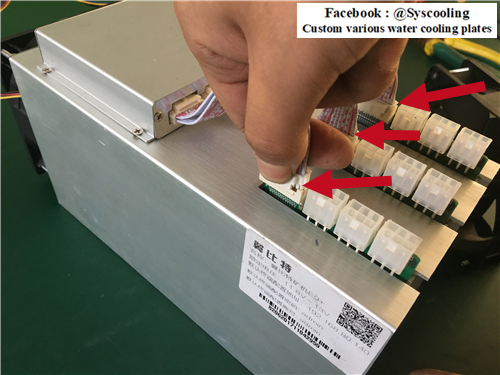
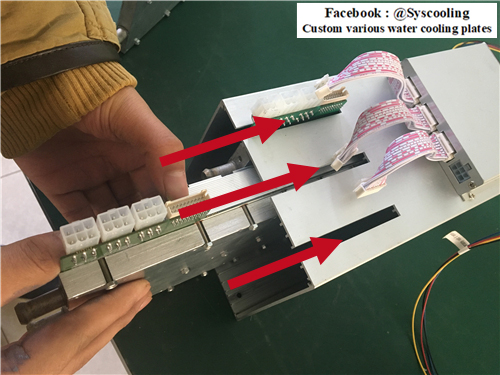
https://s1.ax1x.com/2017/12/06/ohV3D.jpg(3)pull out 3 data lines
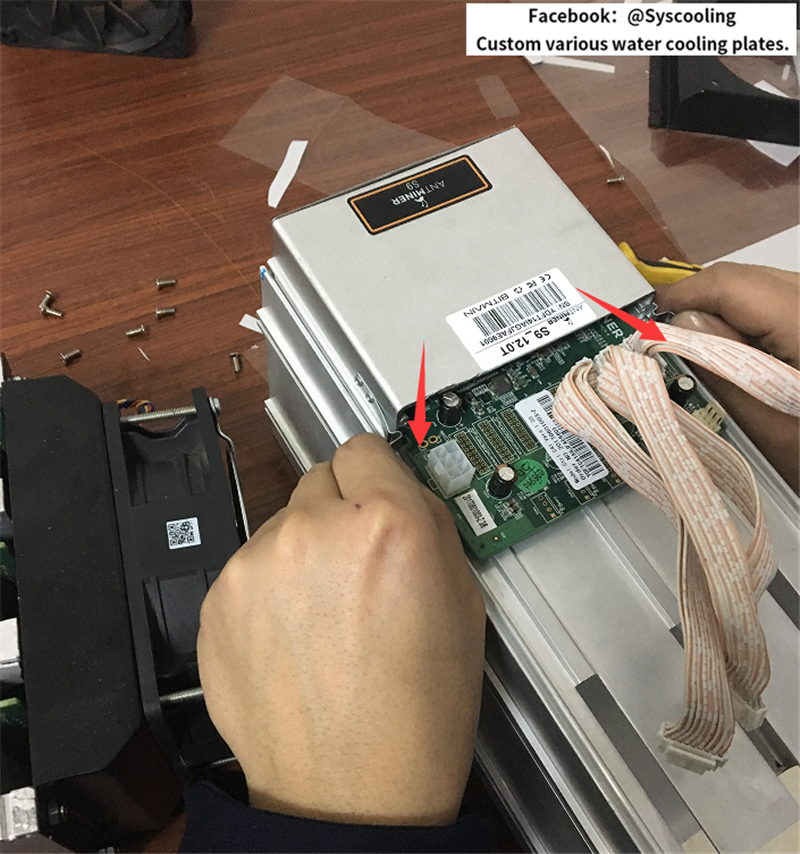
https://s1.ax1x.com/2017/12/06/ohnud.jpg(4)screw off 3 screws which on here
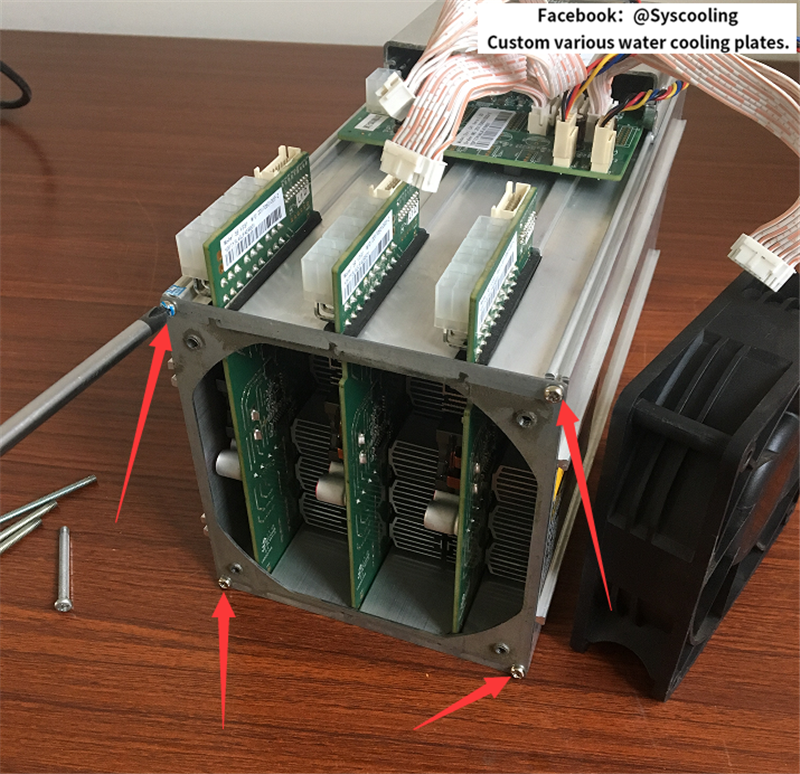
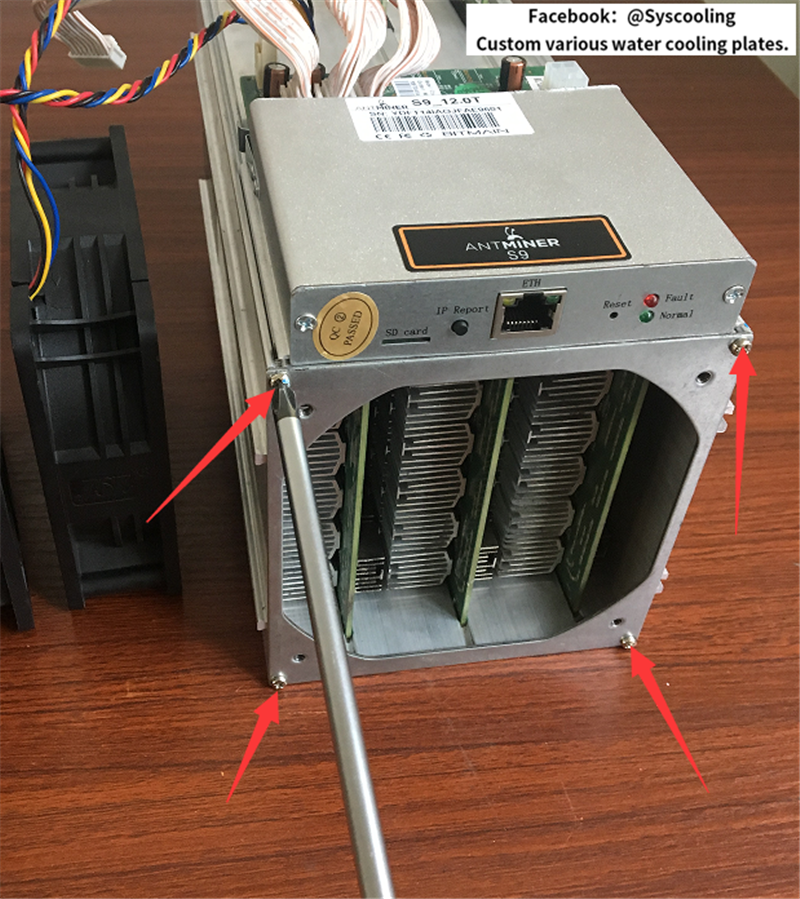
https://s1.ax1x.com/2017/12/06/ohuDA.jpg(5)screw off 6 screws which on here
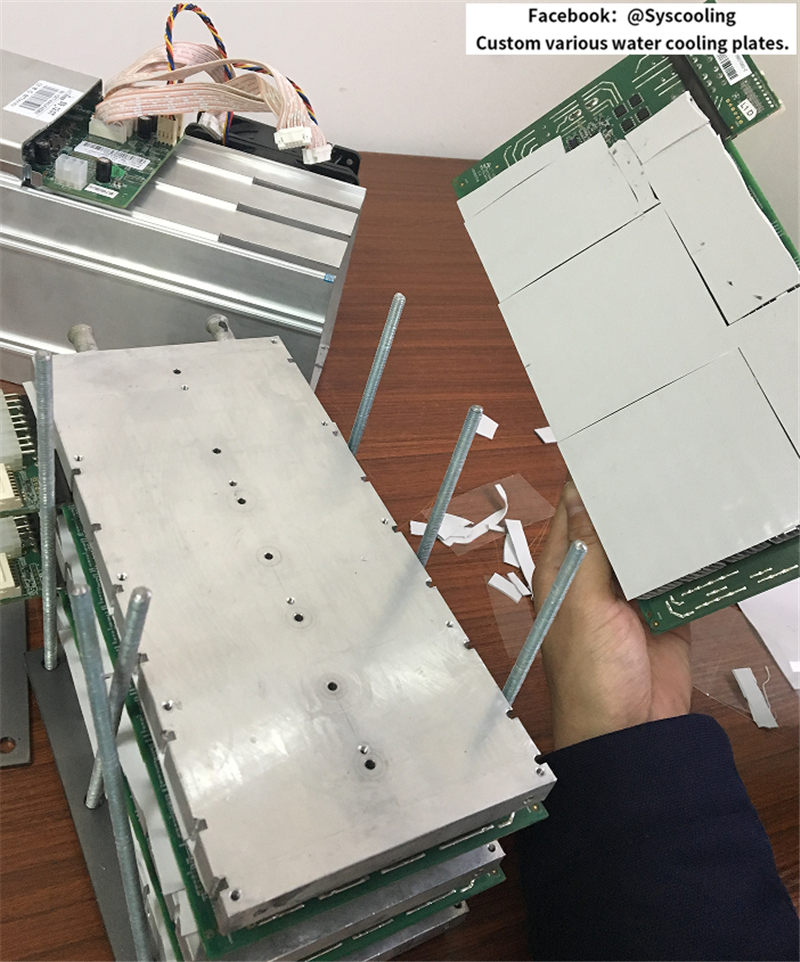
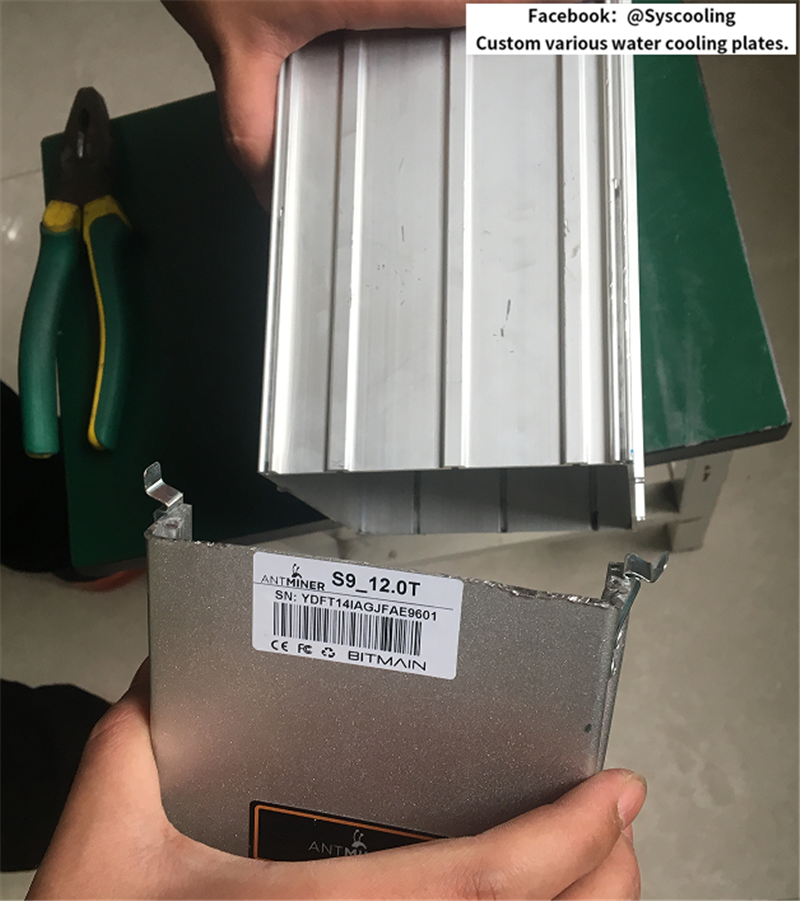
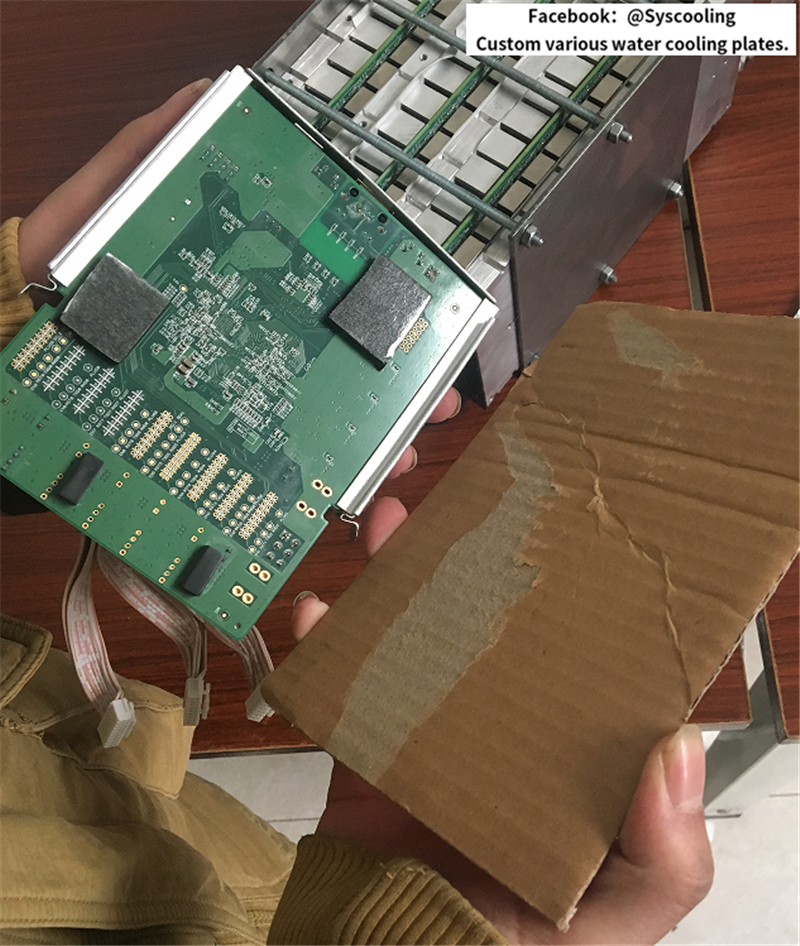
https://s1.ax1x.com/2017/12/06/ohKHI.jpg(6)take out 3 hashrate plates
https://s1.ax1x.com/2017/12/06/ohlUP.jpg(7)three hashrate plates
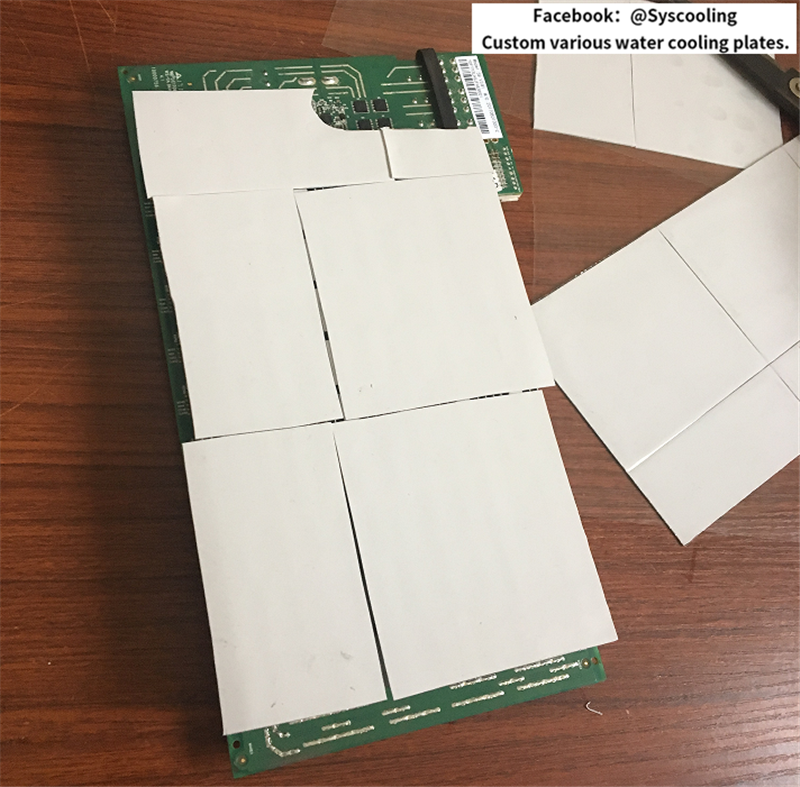
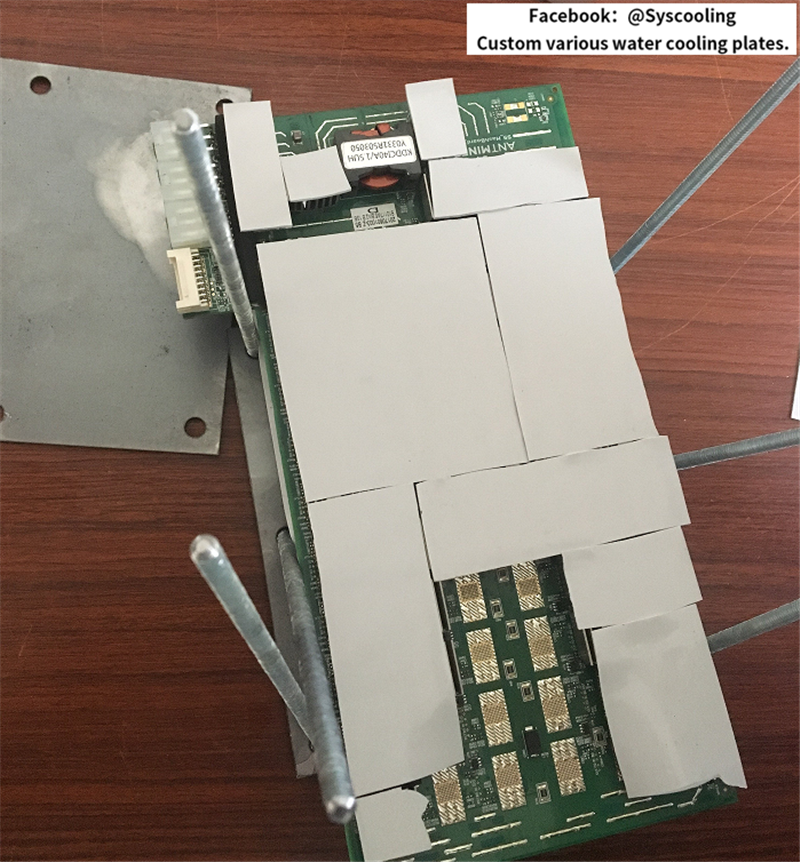
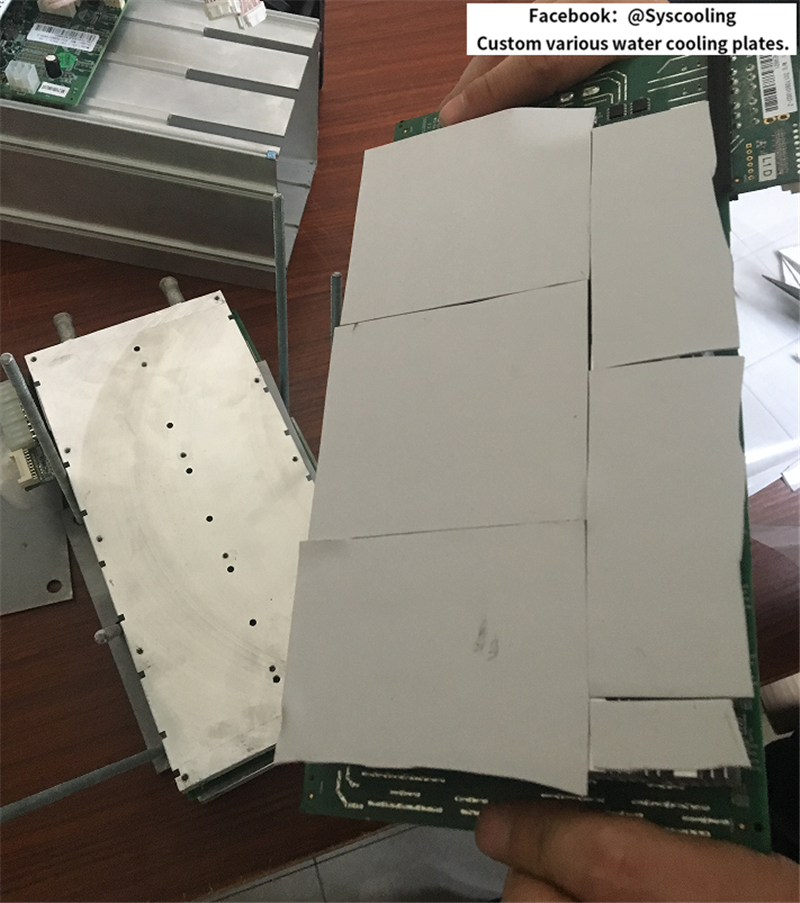
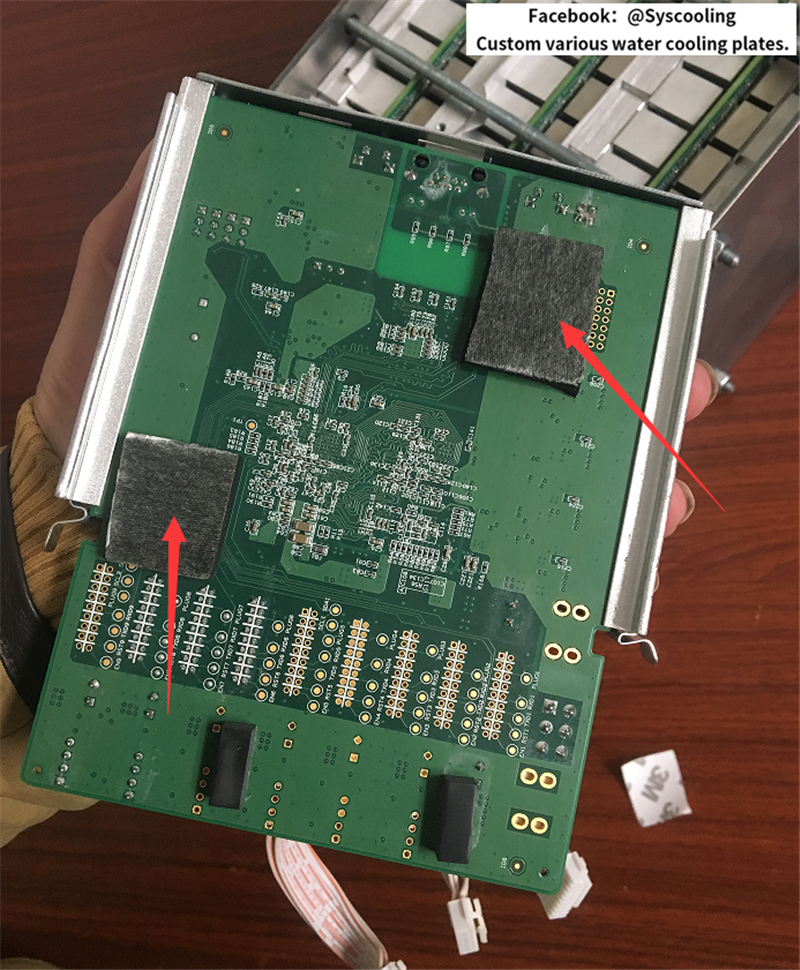
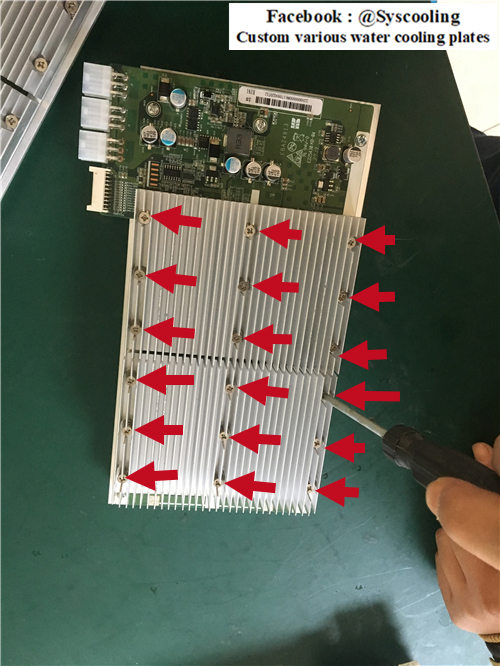
https://s1.ax1x.com/2017/12/06/ohQEt.jpg(8)screw off 18 screws which on the hashrate plate front
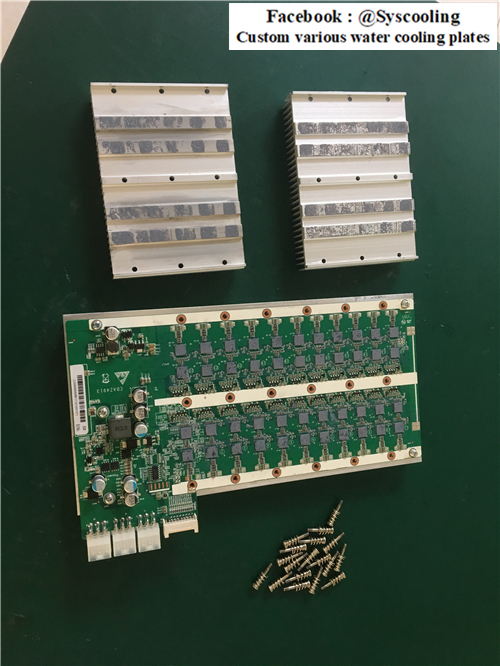
https://s1.ax1x.com/2017/12/06/oh14f.jpg(9)remove the cooling fin which on the hashrate plate front
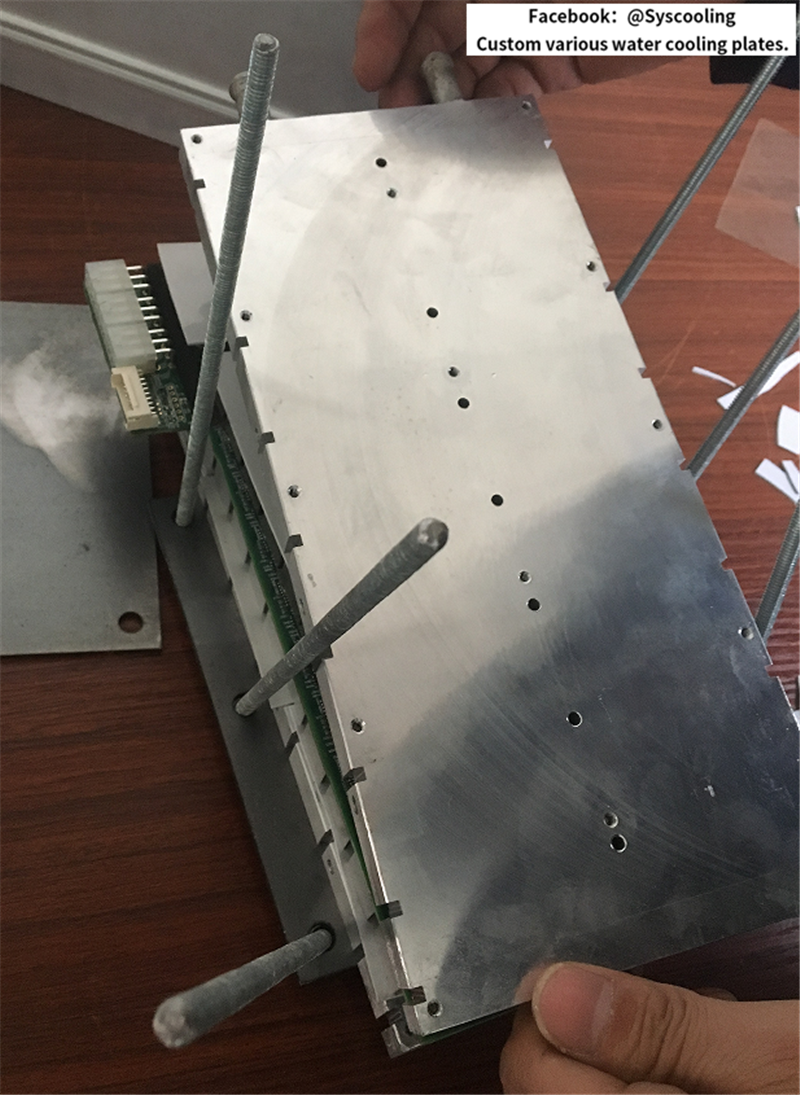
https://s1.ax1x.com/2017/12/06/oh8C8.jpg(10)screw off 5 screws which on here
https://s1.ax1x.com/2017/12/06/ohG8S.jpg(11)screw off cooling fin which on the hashrate plate back
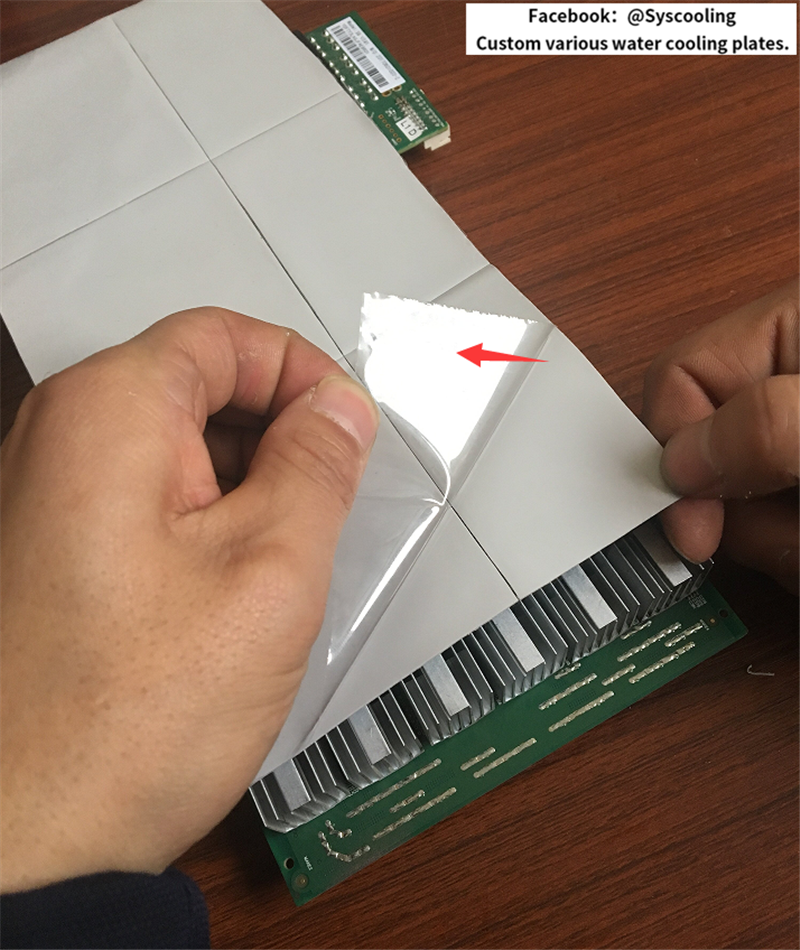
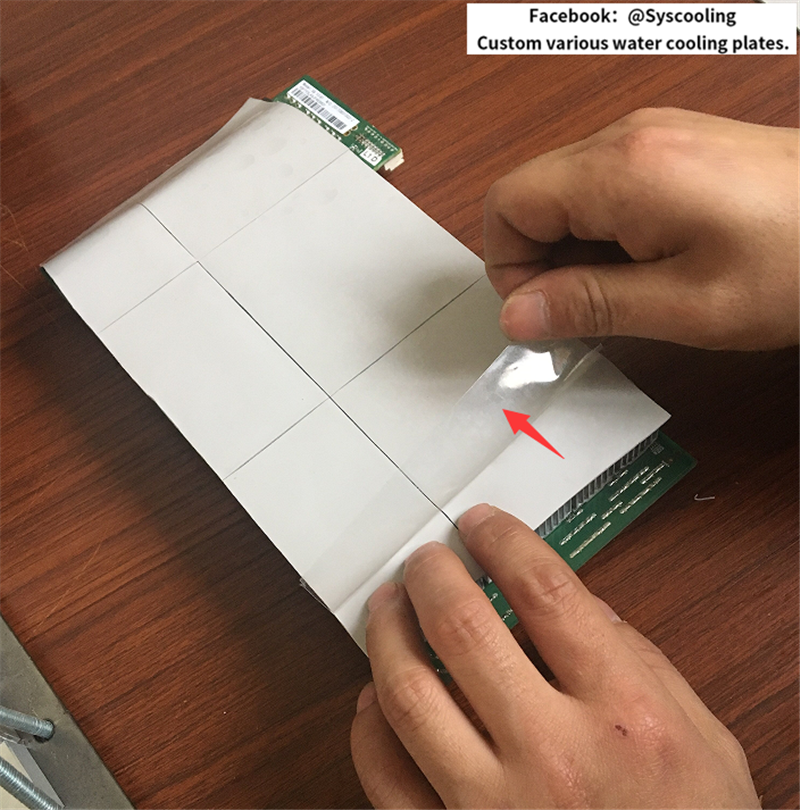
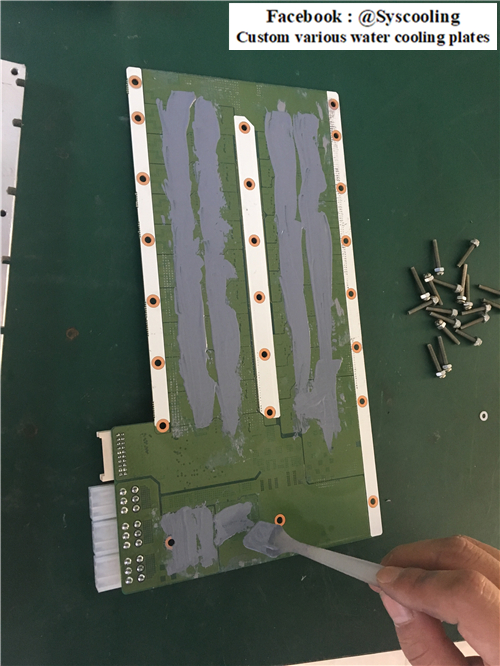
https://s1.ax1x.com/2017/12/06/ohJgg.jpg(12)paint the thermal grease on the hashrate plate back
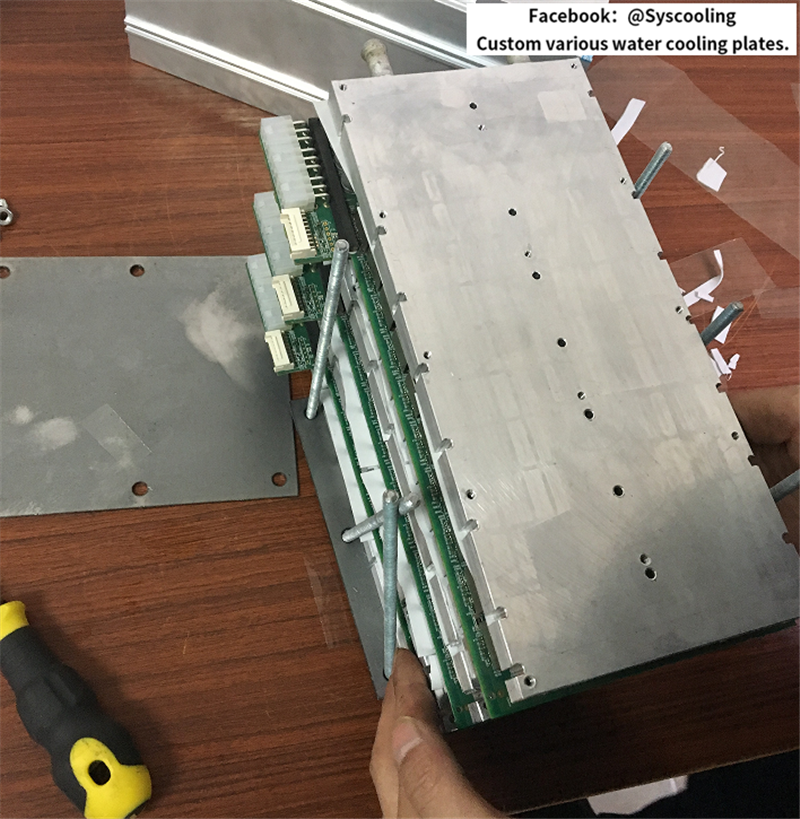
https://s1.ax1x.com/2017/12/06/ohNuj.jpg(13)put the hashrate plate on the water cooling plate, and paint the thermal grease on hashrate plate front
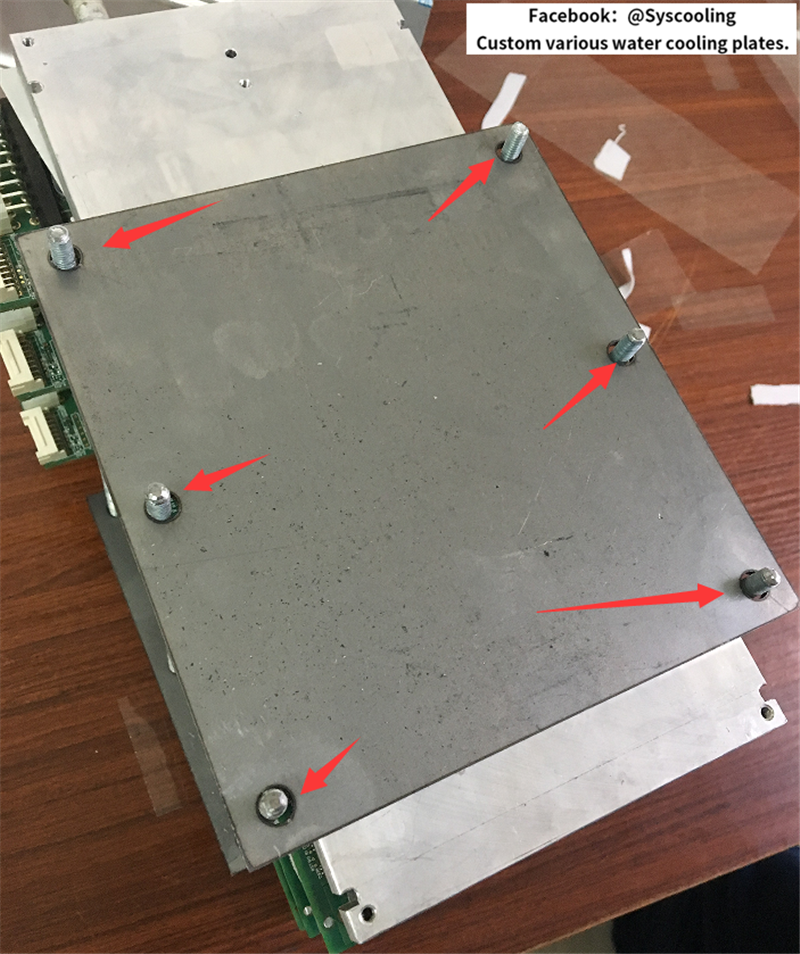
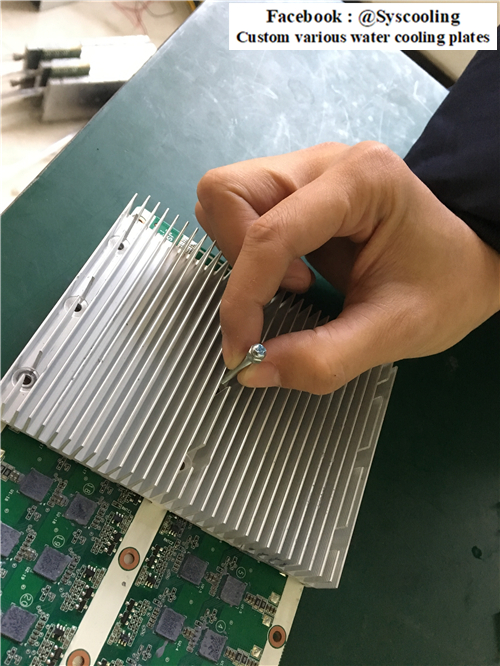
https://s1.ax1x.com/2017/12/06/ohabn.jpg(14)twist the screw and screw nut in these 5 positions
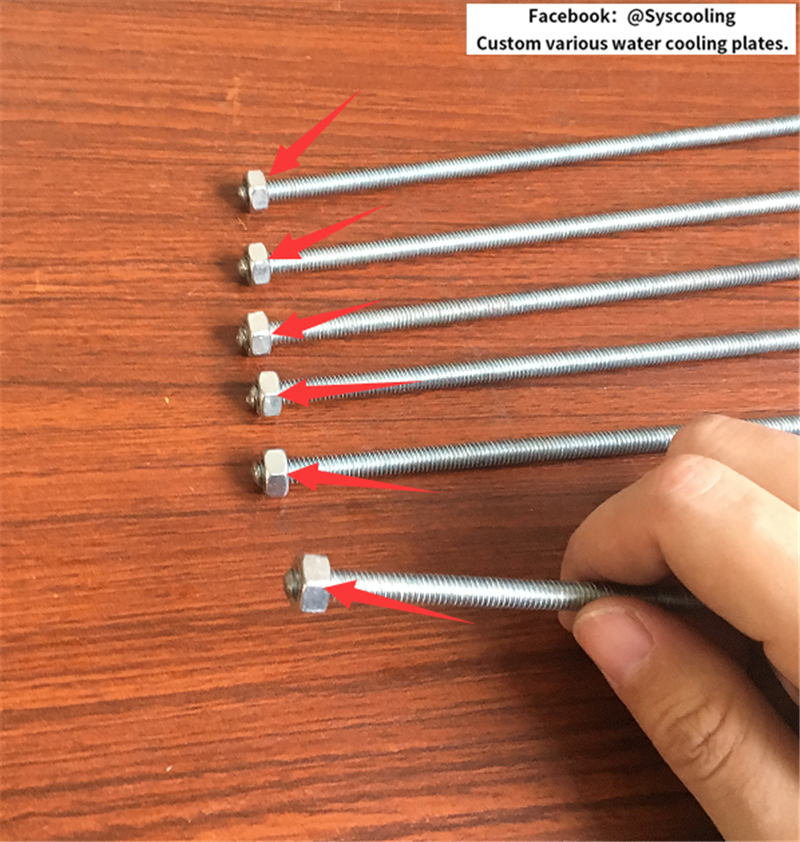
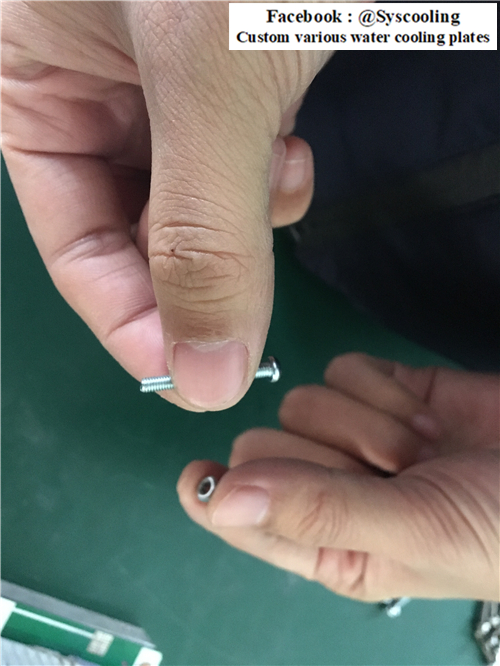
https://s1.ax1x.com/2017/12/06/ohYvQ.jpg(15)due to the M3*25 screw is a little long, so screw the M3 screw nut on the M3*25 screw top firstly, use it as a spacer.
https://s1.ax1x.com/2017/12/06/ohwEq.jpg(16)due to the M3*25 screw is a little long, so screw the M3 screw nut on the M3*25 screw top firstly, use it as a spacer.
https://s1.ax1x.com/2017/12/06/ohUDs.jpg(17)install the M3*25 screw which is fixed the screw nut on the cooling fin.
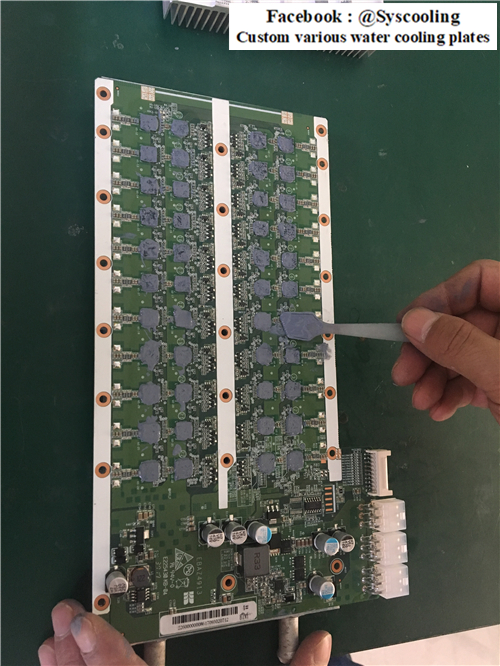
https://s1.ax1x.com/2017/12/06/ohs8U.jpg(18)put cooling fin on the hashrate plate front, twist the screw and screw nut in the diagram position.
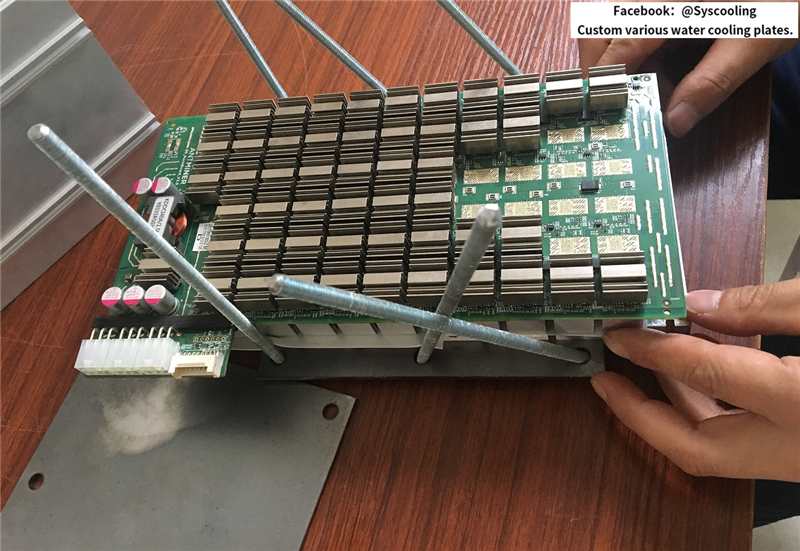
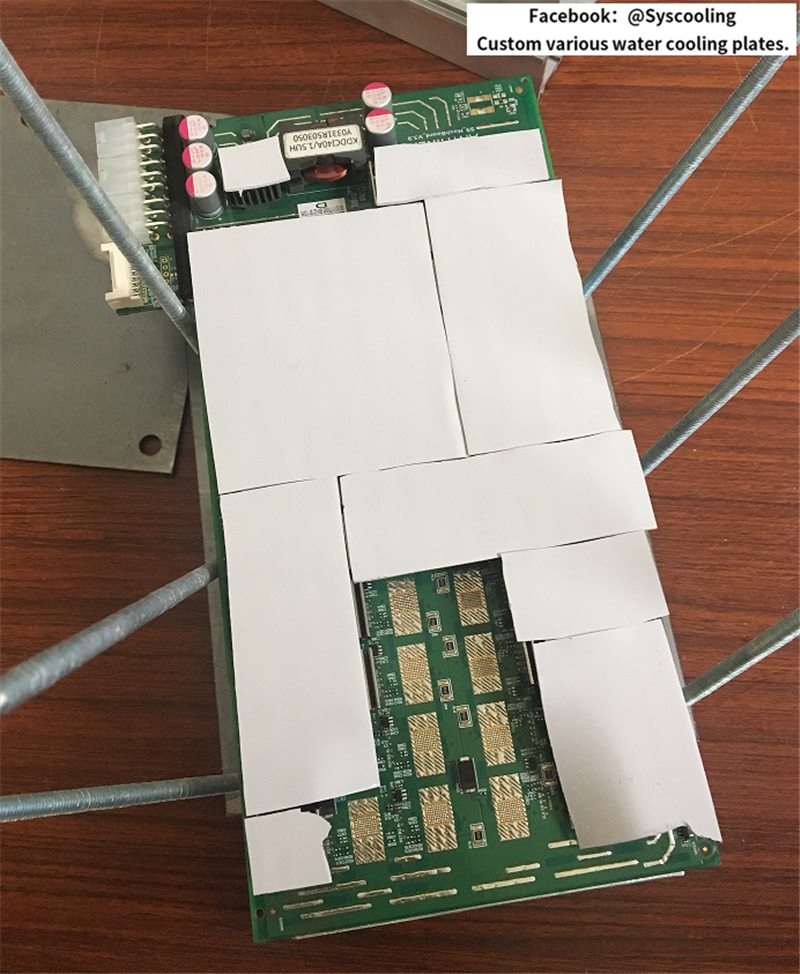
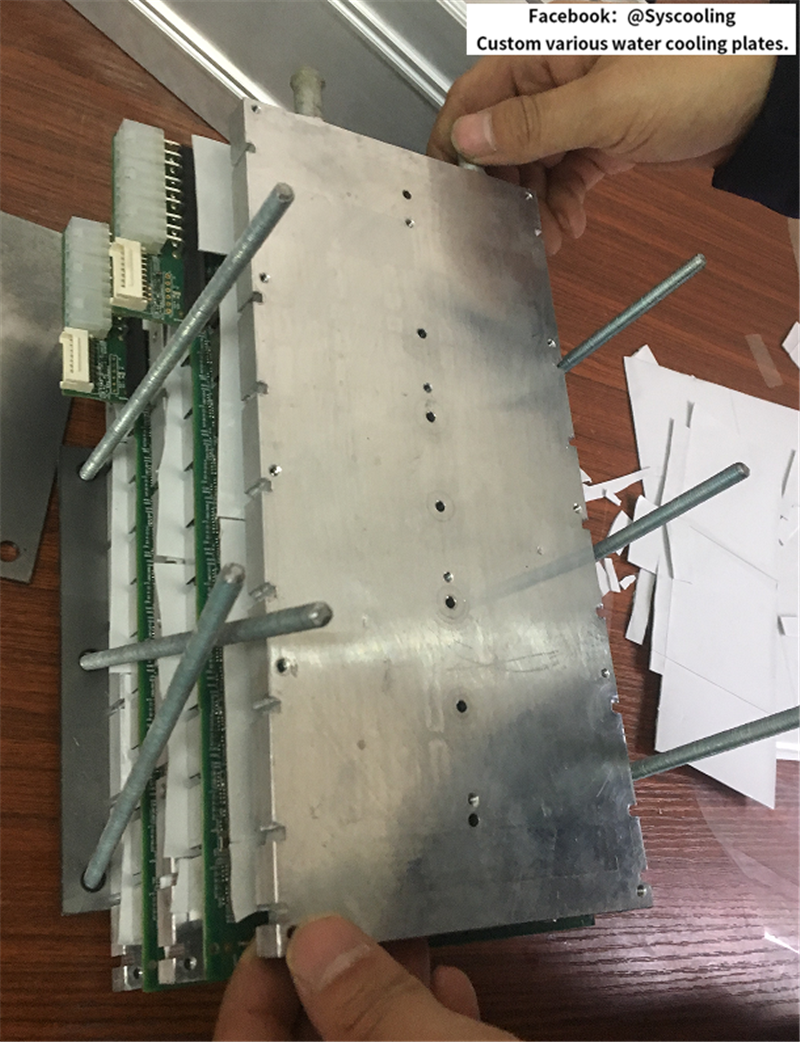
https://s1.ax1x.com/2017/12/06/ohB5V.jpg(19)three hashrate plates after installing.
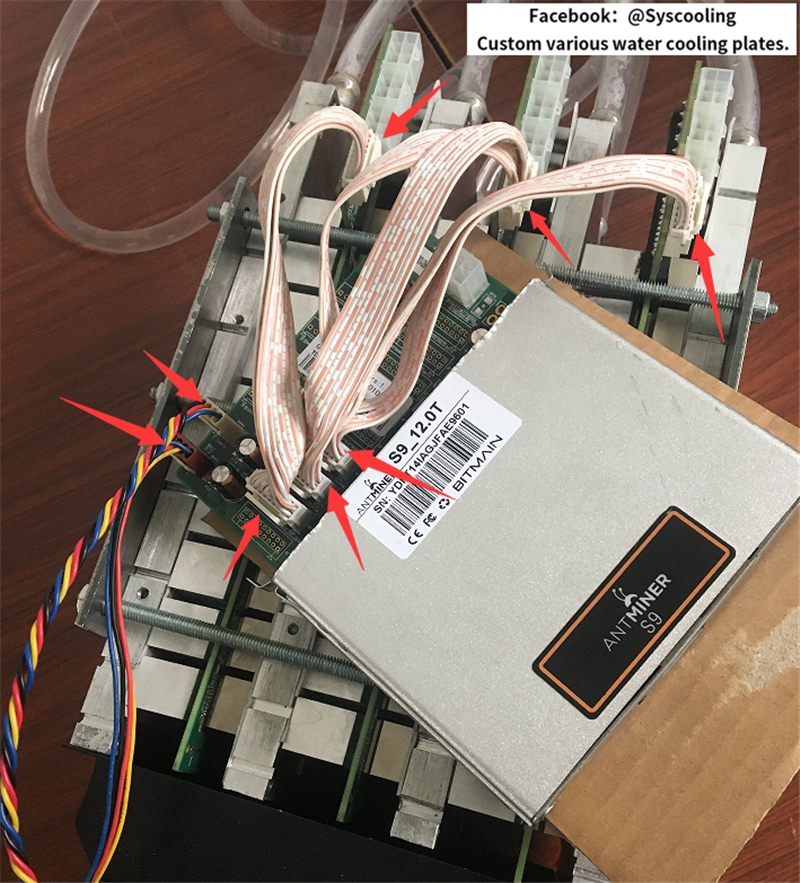
https://s1.ax1x.com/2017/12/06/oh0U0.jpg(20)put back the hashrate plate which are installed the water cooling plate to the computer case.
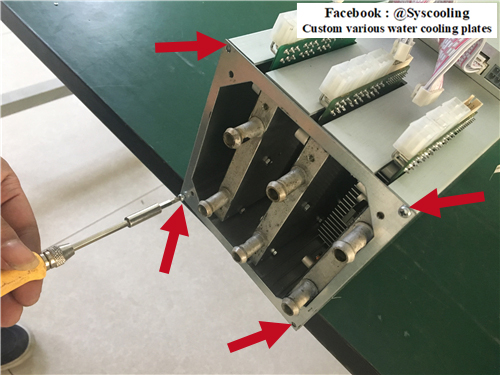
https://s1.ax1x.com/2017/12/06/ohrCT.jpg(21)install the square metal frame to computer case
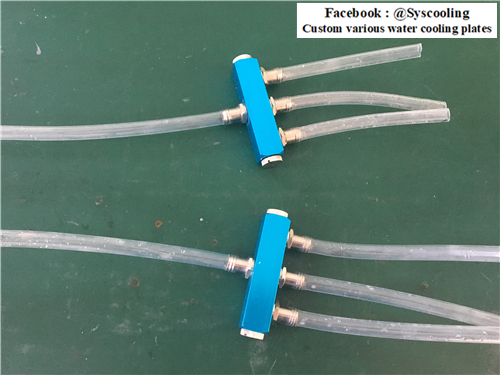
https://s1.ax1x.com/2017/12/06/ohy2F.jpg(22)install the flexible tube, water separator, pagoda head and plug together.
https://s1.ax1x.com/2017/12/06/oh6v4.jpg(23)temperature is low in winter, first,we can put the flexible tube in hot water for a few second, make it softer and they are easy to plug to the pagoda.
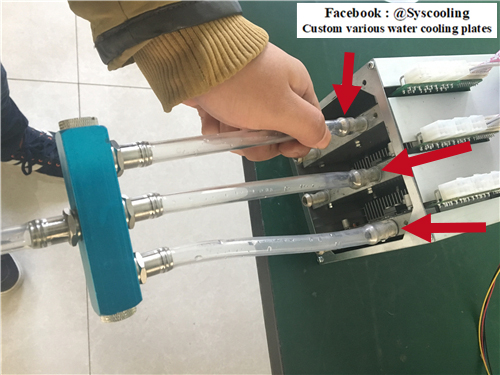
https://s1.ax1x.com/2017/12/06/ohRbR.jpg(24)the flexible tubes who from the same water separator plug to the same side water nozzle in water cooling plate.
https://s1.ax1x.com/2017/12/06/ohgKJ.jpg(25)flexible tubes who from other separator plug to other side of water cooling plate.
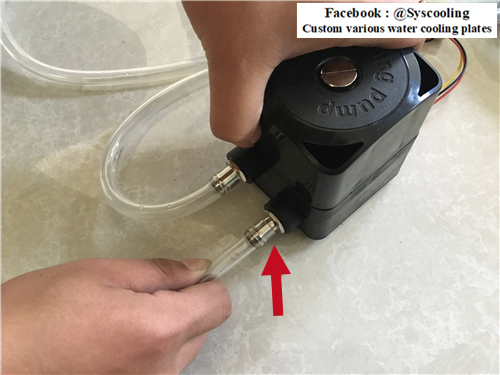
https://s1.ax1x.com/2017/12/06/oh2r9.jpg(26)screw 2 pagoda head in the water pump inet and outlet
https://s1.ax1x.com/2017/12/06/ohfV1.jpg(27)water pump inlet and outlet connect a flexible tube of water cooling plate.
(cooling kit is one-by-two, that mean one set can cooling for two E9 at the same time, in this show we only connect one E9, if connect two E9, you can make the water pump outlet connect to two inlet soft tube of two E9 water cooling plate by the tee. )
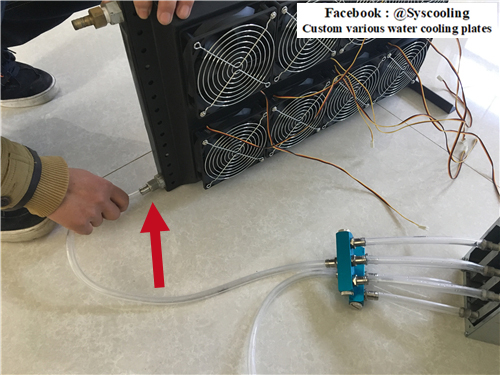
https://s1.ax1x.com/2017/12/06/ohhUx.jpg(28)the other soft tube of water cooling plate connect radiator.
(cooling kit is one-by-two, that mean one set can cooling for two E9 at the same time,in this show we only connect one E9, if connect two E9,you can make the outlet soft tube of two E9 water cooling plates connect to the radiator by tee.)
https://s1.ax1x.com/2017/12/06/oh456.jpg(29)the top of radiator connect to the radiator, turn into the inlet of water pump.
https://s1.ax1x.com/2017/12/06/ohIPK.jpg(30)the top of radiator connect to the radiator, turn into the inlet of water pump.
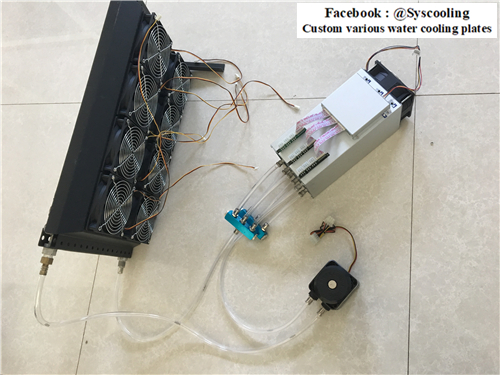
https://s1.ax1x.com/2017/12/06/oho8O.jpg(31)complete the waterway connection
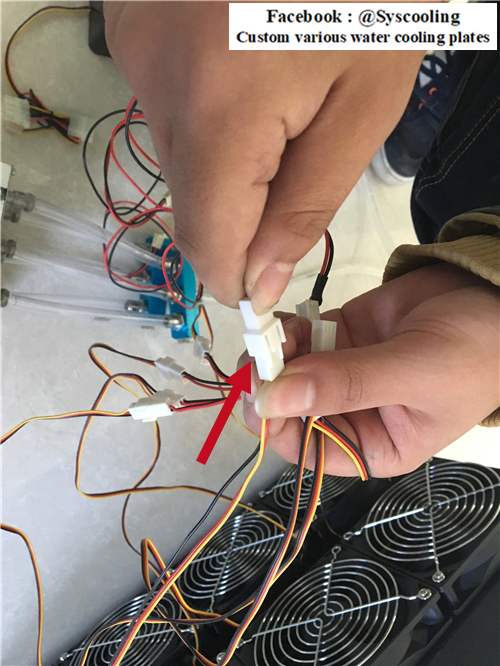
https://s1.ax1x.com/2017/12/06/oh7xe.jpg(32)connect the fan connector to fan extension line
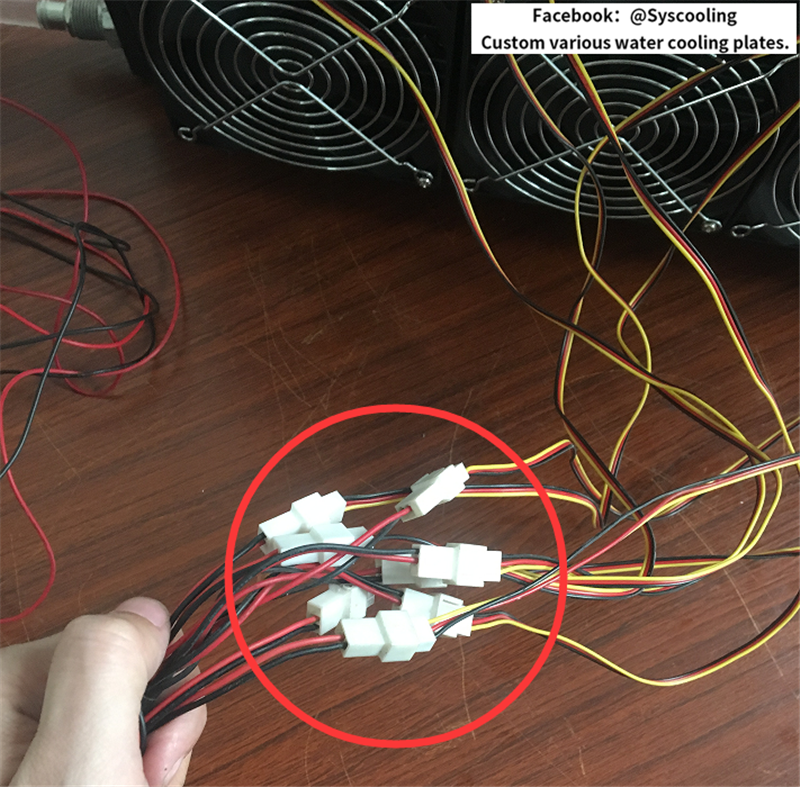
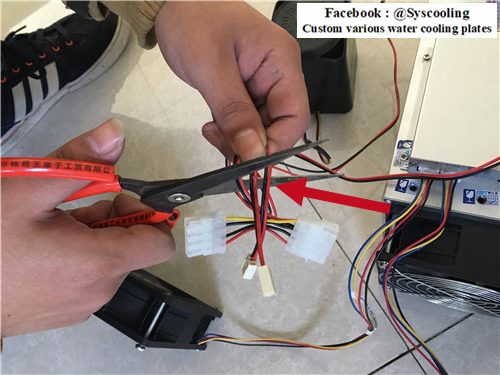
https://s1.ax1x.com/2017/12/06/ohbKH.jpg(33)then start changing line, firstly, cut off two fan extension lines and the connector of water pump power line.
https://s1.ax1x.com/2017/12/06/ohT2D.jpg(34)and then cut off a connector of the mining machine fan,
(if other fan need to change to the low speed fan, you can play your best, syscooling provide low speed and temperatrue control fan, this time we are not modify the other fan.)
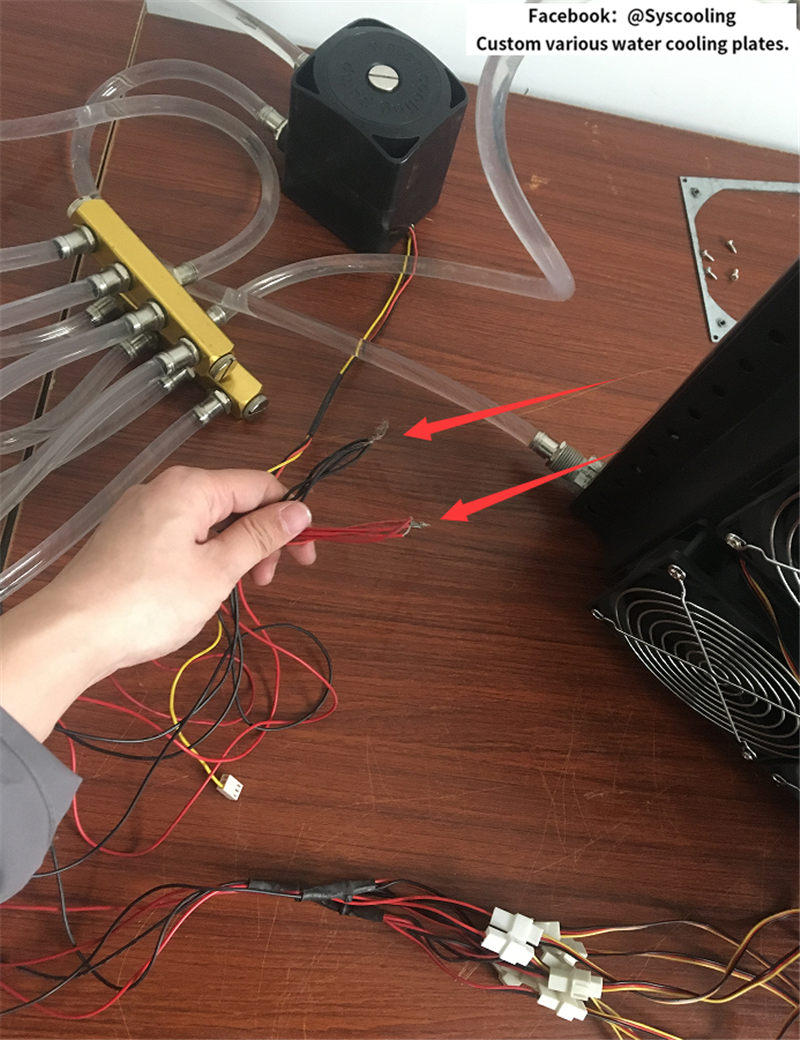
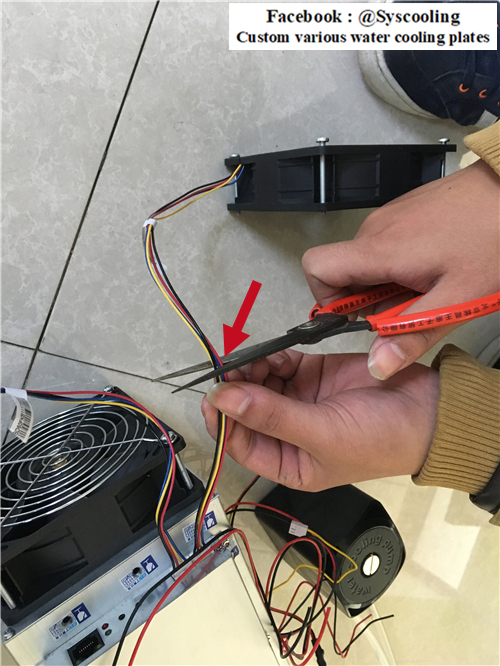
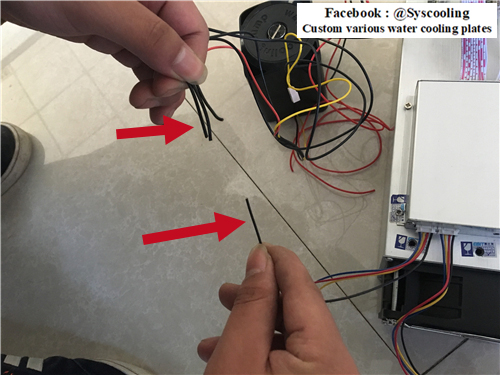
https://s1.ax1x.com/2017/12/06/ohqrd.jpg(35)strip off 4 red lines of the line after cutting, connect these together.
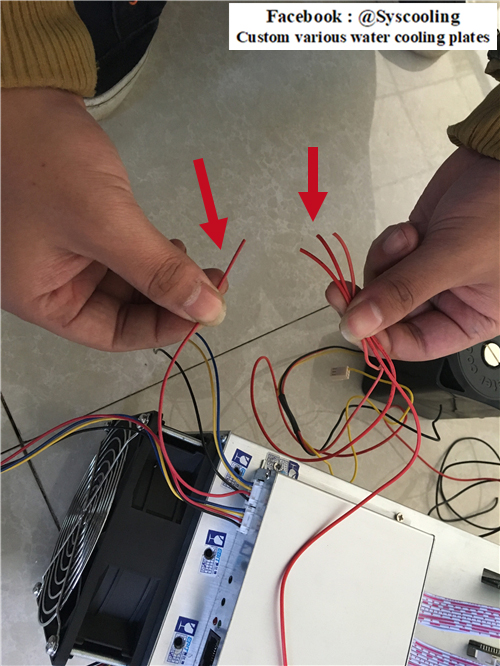
https://s1.ax1x.com/2017/12/06/ohvIP.jpg(36)strip off 4 black lines of the line after cutting, connect these together.
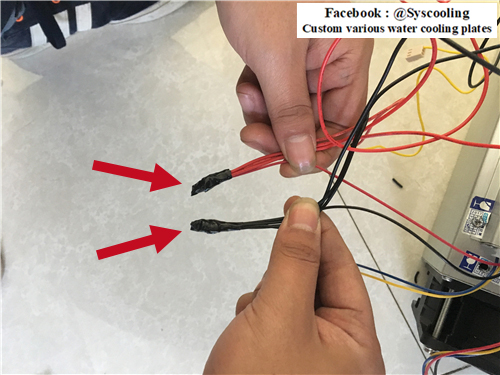
https://s1.ax1x.com/2017/12/06/ohLqA.jpg(37)after cutting
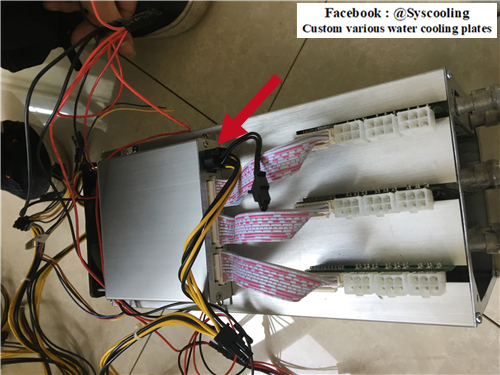
https://s1.ax1x.com/2017/12/06/ohjat.jpg(38)connect the power source for fan of the mining machine, after adding the liquid , we can connect other power connector.
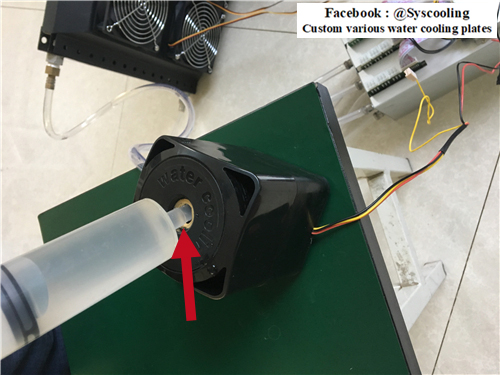
https://s1.ax1x.com/2017/12/06/ohXVI.jpg(39)put the water pump in a higher position, start adding liquid.
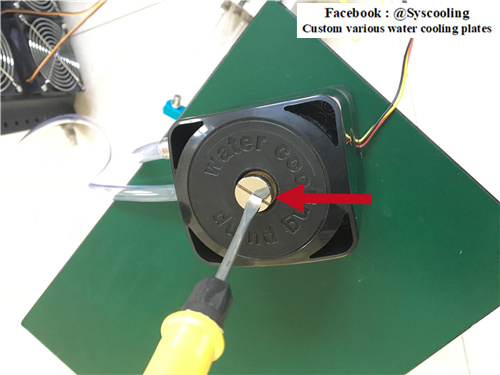
https://s1.ax1x.com/2017/12/06/o4pRS.jpg(40)screw off this injection plug.
https://s1.ax1x.com/2017/12/06/ohzPf.jpg(41)electrify the mining machine, meanwhile adding the liquid, notice that moment mining only connect the power connector of fan, other connectors dont connect now.
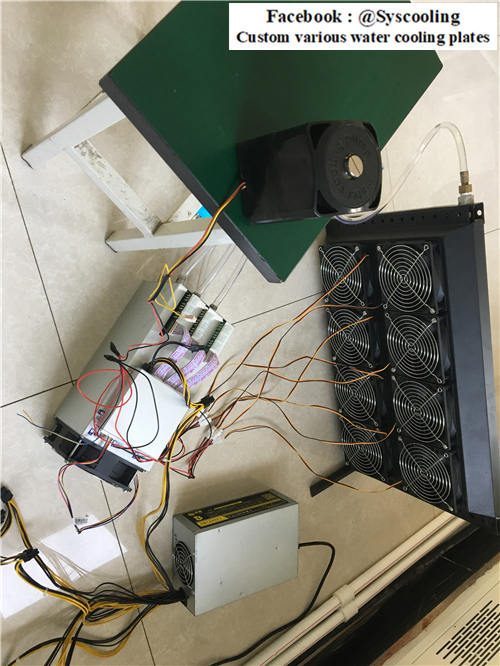
https://s1.ax1x.com/2017/12/06/o4SG8.jpg(42)finish modification, in the end, after making sure there are no mistake, we can connect other power line and cable.
https://s1.ax1x.com/2017/12/06/o49xg.jpg
(Moderator's note: This post was edited by frodocooper to remove inline image tags.)
